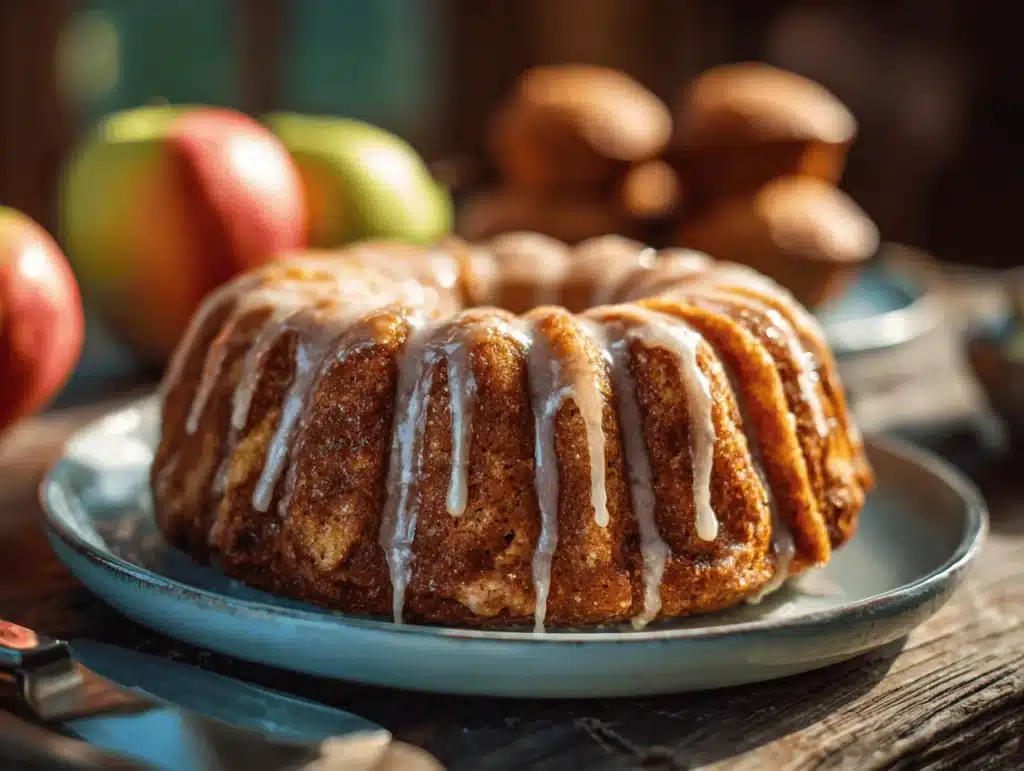
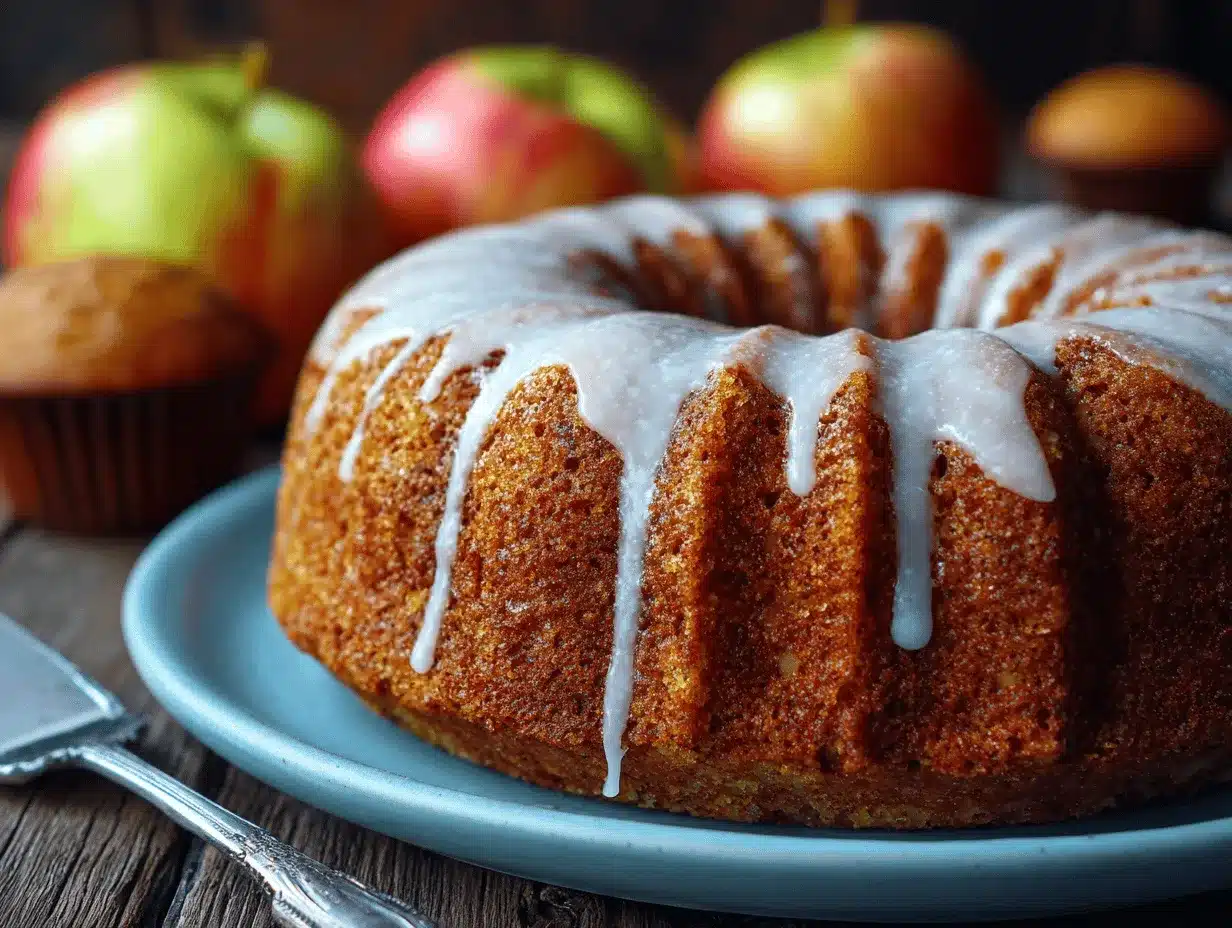
The scent of cinnamon and baked apples drifting through my kitchen always means one thing: it’s time for my favorite vintage apple cake recipe. Honestly, this cake is autumn nostalgia baked into every bite – it reminds me of crisp leaves, cozy sweaters, and childhood afternoons spent peeling apples with my grandma. There’s something about the way the apples soften and caramelize in the oven that just makes the whole house feel warmer. I’ve baked this cake at least a dozen times, tweaking measurements, experimenting with different apple varieties, and even passing it on to friends who now swear by it. If you’re searching for a homemade autumn dessert that feels like a hug and tastes like tradition, you’ve landed in the right spot.
This vintage apple cake recipe isn’t just about flavor (though, let’s face it, it’s absolutely packed with buttery richness and tangy apple sweetness). It’s about simplicity, comfort, and that little thrill you get when you slice into a golden, fragrant cake and find tender apples nestled inside. My kids always fight over the corners because they’re caramelized and chewy, while I go for a gooey center slice every time. Whether you’re baking for family, looking for a crowd-pleaser for your next get-together, or just want a treat that pairs perfectly with coffee on a chilly morning, this cake delivers.
As someone who’s obsessed with classic desserts that don’t require fancy tricks or expensive ingredients, I can say this recipe ticks every box. It’s easy enough for beginners, forgiving if your apples aren’t perfect, and honestly, it’s downright therapeutic to make. So grab your favorite apples, dust off that old cake pan, and let’s bake up some autumn magic together. This vintage apple cake recipe is more than dessert – it’s a delicious memory in the making.
Why You’ll Love This Vintage Apple Cake Recipe
- Quick & Easy: You can whip this up in under 20 minutes before it even hits the oven. Perfect for those spontaneous autumn cravings or when you want dessert without fuss.
- Simple Ingredients: No wild goose chase at the store. You’ll probably have everything you need right in the pantry – just apples, flour, sugar, eggs, and a few spices.
- Perfect for Any Occasion: This cake shines at brunch, holiday gatherings, late-night snacks, or as a sweet addition to a weekday dinner. It’s flexible and always feels special.
- Crowd-Pleaser: I’ve never seen leftovers survive more than a day. Kids love it for the sweet apple chunks, adults love that it isn’t too rich, and everyone appreciates how homey it feels.
- Unbelievably Delicious: It’s got the perfect balance – moist crumb, buttery edges, juicy apples, and a kiss of cinnamon. Sometimes I even sneak a slice for breakfast (no shame!).
What sets this vintage apple cake recipe apart? First, blending diced apples right into the batter ensures every bite is packed with tender fruit. Second, I use a mix of brown and white sugar for deeper flavor, and a sprinkle of coarse sugar on top for a subtle crunch. Honestly, it’s the little touches – like grating fresh nutmeg or using a splash of lemon juice – that make this cake sing. I’ve tested this recipe over and over, swapping baking pans and apple varieties, and it’s always reliable.
It’s not just about taste, though. This cake brings back memories of simpler times – peeling apples with sticky fingers, the sound of a whisk scraping against a bowl, the anticipation as the kitchen fills with that unmistakable autumn aroma. If you’re after a dessert that delivers comfort, ease, and just the right amount of nostalgia, you’ll love this recipe as much as I do.
Ingredients Needed
Honestly, you don’t need much to make this vintage apple cake recipe shine. The ingredients are straightforward and each one plays a crucial role in flavor and texture. Here’s what you’ll need:
- For the Cake Batter:
- 2 cups (250g) all-purpose flour (I prefer King Arthur for a sturdy crumb)
- 1 teaspoon baking powder
- 1/2 teaspoon baking soda
- 1/2 teaspoon salt
- 1 teaspoon ground cinnamon (freshly ground if you can swing it)
- 1/4 teaspoon ground nutmeg (adds warmth – don’t skip!)
- 1/2 cup (115g) unsalted butter, softened (room temperature is key)
- 1/2 cup (100g) granulated sugar
- 1/2 cup (105g) packed light brown sugar (for depth)
- 2 large eggs (room temperature – helps with mixing)
- 2 teaspoons vanilla extract
- 1/4 cup (60ml) whole milk (can sub almond or oat milk for dairy-free)
- 3 medium apples (about 2 cups/260g diced, peeled and cored – Granny Smith for tartness, Honeycrisp for sweetness, or a mix)
- 1 tablespoon lemon juice (keeps apples bright)
- For Topping:
- 2 tablespoons coarse sugar (like turbinado – gives a lovely crunch)
- 1/2 teaspoon cinnamon (optional, but I always add it!)
Let’s talk substitutions: You can swap the flour for a 1-to-1 gluten-free blend if needed (Bob’s Red Mill works well). If you’re dairy-free, use coconut oil or vegan butter instead of regular butter. For extra spice, toss in a pinch of cardamom. And if you’re short on eggs, flaxseed “eggs” (1 tablespoon ground flax + 2.5 tablespoons water per egg) will get the job done.
When it comes to apples, use what’s in season or whatever you have on hand. I’ve even made this with pears when the apple bin was empty – not quite the same, but honestly, still delicious. If you want to stretch the cake a bit, add 1/2 cup chopped walnuts or pecans for crunch.
These ingredients are pantry-friendly, forgiving, and customizable. As long as you’ve got apples, butter, flour, and a little sugar, you’re halfway to baking something magical.
Equipment Needed
- Mixing Bowls: At least two – one for dry ingredients, one for wet. Glass or stainless steel work great.
- Whisk & Spatula: I use a balloon whisk for the batter and a sturdy silicone spatula for folding in apples.
- Measuring Cups & Spoons: Accurate measurements really help here – especially for the flour and spices.
- 9-inch (23cm) Round Cake Pan: Nonstick or greased well. You can use an 8-inch (20cm) pan for a thicker cake, just adjust baking time.
- Peeler & Paring Knife: For prepping apples. If you’ve got a good apple corer, even better.
- Cooling Rack: Keeps the cake from getting soggy on the bottom (lesson learned after forgetting once!).
No stand mixer needed – just a whisk and some elbow grease. If you don’t have a cake pan, a deep pie plate or square brownie pan will work (the shape is less important than the depth). For budget-friendly options, I’ve used basic supermarket pans and hand-me-down tools – just keep them clean and dry after use to avoid rust. If you love baking, investing in a springform pan makes release easier, but it’s not essential for this recipe.
Preparation Method
-
Preheat the Oven & Prep Pan:
Set your oven to 350°F (175°C). Grease a 9-inch (23cm) round cake pan with butter or nonstick spray, then line the bottom with parchment paper for easy release. (Trust me, it saves you from sticky cake disasters!) -
Prepare Apples:
Peel, core, and dice 3 medium apples (about 2 cups/260g). Toss the diced pieces with 1 tablespoon lemon juice to keep them fresh and bright. If you prefer chunks of apple, cut them a bit larger; for a more integrated cake, dice smaller. -
Mix Dry Ingredients:
In a large bowl, whisk together 2 cups (250g) flour, 1 teaspoon baking powder, 1/2 teaspoon baking soda, 1/2 teaspoon salt, 1 teaspoon cinnamon, and 1/4 teaspoon nutmeg. Make sure everything is well blended – no lumps! -
Cream Butter & Sugar:
In another bowl, beat 1/2 cup (115g) softened butter with 1/2 cup (100g) granulated sugar and 1/2 cup (105g) brown sugar until pale and fluffy, about 2-3 minutes. If you’re using a whisk, work in some wrist-action for a lighter texture. -
Add Eggs & Vanilla:
Beat in 2 eggs, one at a time, mixing well after each. Stir in 2 teaspoons vanilla extract. Your batter should look smooth and slightly glossy (if it curdles, don’t panic – it’ll come together once you add flour). -
Combine Wet & Dry Ingredients:
Add the flour mixture to the butter mixture in three parts, alternating with 1/4 cup (60ml) milk. Stir gently after each addition, just until combined. Overmixing can make the cake tough, so stop when you don’t see dry streaks. -
Fold in Apples:
Using your spatula, fold the diced apples into the batter until evenly distributed. The batter will be thick and chunky – that’s perfect! -
Transfer to Pan & Add Topping:
Spread the batter into your prepared pan, smoothing the top. Sprinkle with 2 tablespoons coarse sugar and 1/2 teaspoon cinnamon, if desired. This creates a lovely, crackly crust. -
Bake:
Bake for 45-55 minutes, or until a toothpick inserted in the center comes out clean (or with just a few moist crumbs). The top should be golden, and the edges slightly pulled away from the pan. -
Cool:
Allow the cake to cool in the pan for 15 minutes, then carefully turn it out onto a wire rack. Peel off parchment paper. Cool completely before slicing (I know it’s hard, but it helps the cake set!).
Troubleshooting: If the cake sinks in the middle, it’s likely underbaked – add 5 more minutes next time. If apples float to the top, dice smaller or toss with a tablespoon of flour before folding in. If your oven runs hot, check at 40 minutes to avoid burning those edges.
For efficiency, prep apples while the oven heats and measure dry ingredients while the butter softens. Getting everything ready before you start mixing means less stress and fewer forgotten steps.
Cooking Tips & Techniques
After years of baking apple cakes, I’ve picked up a few tricks – and made plenty of mistakes along the way!
- Apple Type Matters: Tart apples (Granny Smith) hold their shape and don’t turn mushy, while sweet apples (Honeycrisp, Fuji) add moisture. Mixing varieties gives the best balance.
- Don’t Overmix: Once you add flour, stir only until combined. Overworking the batter leads to a tough, dense cake (been there, regretted that!).
- Test Early & Often: Every oven is different. Start checking at 45 minutes – the cake should spring back when lightly pressed and a toothpick should come out mostly clean.
- Room Temperature Ingredients: Butter and eggs blend better and help create a lighter crumb. If you forget, submerge eggs in warm water for 5 minutes.
- Multitasking: Peel and dice apples while the oven preheats and the butter softens. It saves time and makes the process flow smoothly.
- Topping Texture: The coarse sugar on top isn’t just for looks – it gives a subtle crunch that contrasts with the soft cake. If you skip it, the cake will be fine, just less fun.
I once left the cake in for 10 minutes too long and ended up with caramelized, almost chewy edges. Not a disaster, but definitely a lesson in watching the timer. If your apples are extra juicy, toss them in a little flour before folding in – it prevents sogginess. And honestly, don’t stress about perfection. Some of my best cakes have had uneven tops and lopsided slices!
Variations & Adaptations
This vintage apple cake recipe is a blank canvas for all kinds of creative twists. Here are a few of my favorites:
- Gluten-Free: Swap the all-purpose flour for a 1-to-1 gluten-free blend. I like Bob’s Red Mill – the texture stays moist and no one ever notices the difference.
- Vegan: Use vegan butter or coconut oil, almond milk, and substitute flax eggs (1 tbsp ground flaxseed + 2.5 tbsp water per egg). The cake stays tender and flavorful.
- Nutty Variation: Fold in 1/2 cup chopped walnuts or pecans for crunch. I’ve even added a handful of raisins or dried cranberries for an extra autumn vibe.
- Spice It Up: Add a pinch of cardamom or allspice for a deeper, more complex flavor. Sometimes I sprinkle a little ginger in the batter for warmth.
- Different Cooking Methods: This recipe works in a loaf pan (bake 10-15 minutes longer) or as muffins (reduce baking time to 25-30 minutes). Try it in a cast iron skillet for a rustic look.
One time I swapped half the apples for pears and added a squeeze of orange juice – it was a hit, especially with a drizzle of honey on top. If you’re baking for allergies, skip the nuts and use oat milk. For a festive twist, top with a simple vanilla glaze or powdered sugar. The possibilities are endless, and every adaptation makes the cake your own.
Serving & Storage Suggestions
This vintage apple cake is best served slightly warm or at room temperature. I love presenting it on a rustic wooden board with a dusting of powdered sugar and a few apple slices for color. Pair with hot tea, cider, or even a scoop of vanilla ice cream if you’re feeling indulgent.
For storing, wrap leftovers tightly in plastic wrap or place in an airtight container. The cake keeps well at room temperature for up to 2 days, and in the refrigerator for about 5 days. In fact, the flavors deepen overnight – the spices get cozier and the apples infuse the crumb even more. To freeze, slice the cake and wrap each piece individually. Thaw at room temperature or pop a slice in the microwave for 15 seconds.
Reheating tip: For best results, warm a slice in the oven at 325°F (165°C) for 5-7 minutes. It revives the texture and brings out the apple aroma. Honestly, cold cake is underrated too – especially with coffee in the morning!
Nutritional Information & Benefits
| Per Serving (1/10 of cake) | Estimated Values |
|---|---|
| Calories | 230 |
| Protein | 3g |
| Fat | 7g |
| Carbohydrates | 38g |
| Fiber | 2g |
| Sugar | 19g |
Apples are full of fiber and vitamin C, and cinnamon is known for its natural antioxidants. This cake is lower in fat than traditional apple desserts and can be made gluten-free or dairy-free with simple swaps. If you have nut allergies, just skip the nuts – the cake is delicious either way. From a wellness perspective, I love that you get a good dose of fruit with each slice, and it’s sweet but not over-the-top. Just remember: moderation is key, but enjoying food is part of a healthy life!
Conclusion
This vintage apple cake recipe is more than just dessert – it’s a slice of autumn nostalgia, straight from my kitchen to yours. It’s easy, reliable, and endlessly adaptable, making it perfect for any home baker (no matter your skill level). Whether you’re reliving childhood memories or creating new ones, this cake brings warmth, comfort, and a little bit of magic to your table.
I love how this recipe feels like a tradition, even if you’re baking it for the first time. Don’t be afraid to tweak it to suit your family’s taste – add your favorite nuts, swap spices, or try new apple varieties. That’s the beauty of homemade baking!
If you try this vintage apple cake recipe, let me know how it goes in the comments – or share your own twist! I’d love to see your photos, hear your stories, and learn about your favorite autumn desserts. Happy baking, and here’s to making sweet memories one slice at a time!
FAQs
What kind of apples are best for this vintage apple cake recipe?
I recommend using a mix of tart (Granny Smith) and sweet (Honeycrisp, Fuji) apples for the best flavor and texture. If you only have one type, that’s fine – just avoid apples that turn mushy when baked like Red Delicious.
Can I make this apple cake gluten-free?
Absolutely! Just swap the all-purpose flour for a 1-to-1 gluten-free blend. The texture stays soft and moist, and no one will notice the difference.
Do I need to peel the apples?
Peeling is recommended for the classic texture, but you can leave the skins on for a rustic look and extra fiber. Just make sure to wash them well.
How do I prevent the apples from sinking to the bottom?
Toss the diced apples with a tablespoon of flour before folding into the batter. This helps them stay suspended throughout the cake.
Can I freeze leftover apple cake?
Yes! Slice the cake, wrap each piece tightly, and freeze for up to 2 months. Thaw at room temperature or microwave briefly before serving.
Pin This Recipe!
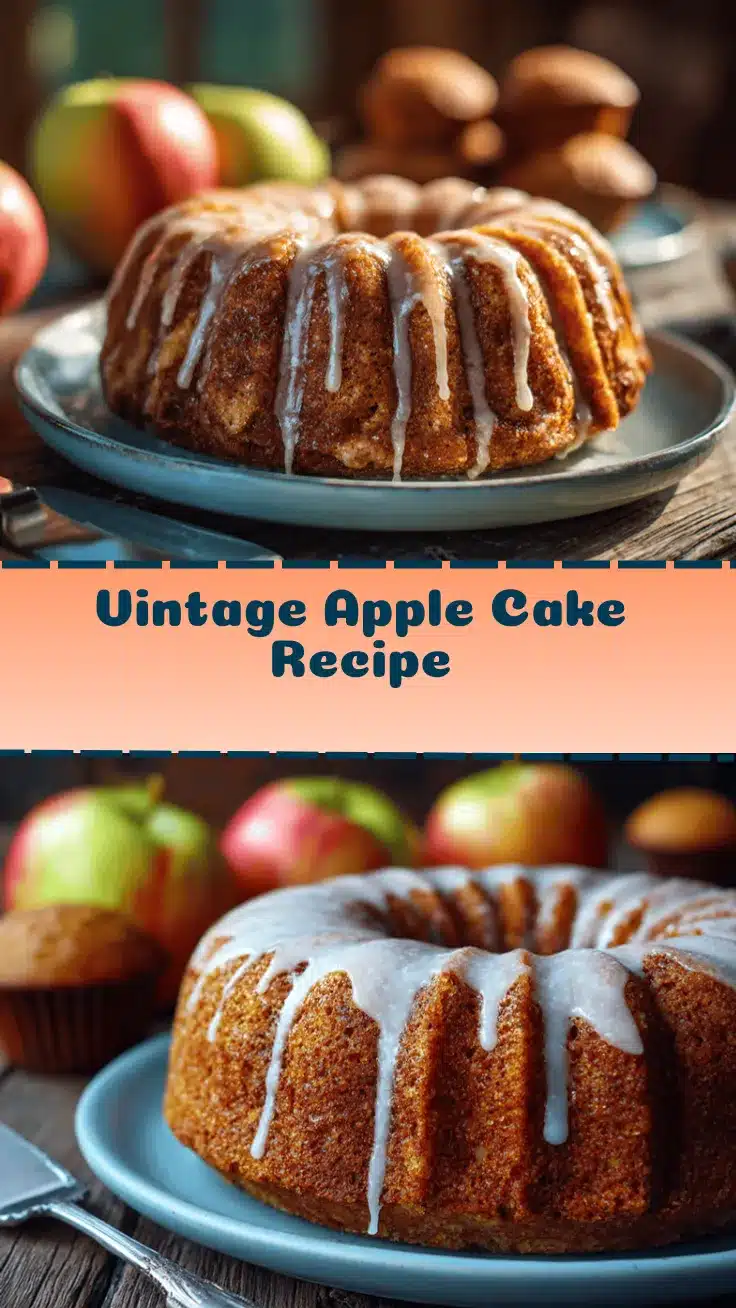
Vintage Apple Cake
- Total Time: 1 hour 15 minutes
- Yield: 10 servings 1x
Description
This easy homemade vintage apple cake is packed with tender apples, warm spices, and a buttery crumb. It’s a nostalgic autumn dessert that’s simple to make and perfect for any occasion.
Ingredients
- 2 cups all-purpose flour
- 1 teaspoon baking powder
- 1/2 teaspoon baking soda
- 1/2 teaspoon salt
- 1 teaspoon ground cinnamon
- 1/4 teaspoon ground nutmeg
- 1/2 cup unsalted butter, softened
- 1/2 cup granulated sugar
- 1/2 cup packed light brown sugar
- 2 large eggs
- 2 teaspoons vanilla extract
- 1/4 cup whole milk
- 3 medium apples (about 2 cups diced, peeled and cored)
- 1 tablespoon lemon juice
- 2 tablespoons coarse sugar (for topping)
- 1/2 teaspoon cinnamon (for topping, optional)
Instructions
- Preheat oven to 350°F (175°C). Grease a 9-inch round cake pan and line the bottom with parchment paper.
- Peel, core, and dice 3 medium apples (about 2 cups). Toss with 1 tablespoon lemon juice.
- In a large bowl, whisk together flour, baking powder, baking soda, salt, cinnamon, and nutmeg.
- In another bowl, beat softened butter with granulated sugar and brown sugar until pale and fluffy, about 2-3 minutes.
- Beat in eggs one at a time, then stir in vanilla extract.
- Add the flour mixture to the butter mixture in three parts, alternating with milk. Stir gently after each addition, just until combined.
- Fold in diced apples until evenly distributed.
- Spread batter into prepared pan and smooth the top. Sprinkle with coarse sugar and cinnamon.
- Bake for 45-55 minutes, or until a toothpick inserted in the center comes out clean.
- Cool in pan for 15 minutes, then turn out onto a wire rack and cool completely before slicing.
Notes
Use a mix of tart and sweet apples for best flavor. For gluten-free, substitute a 1-to-1 gluten-free flour blend. Toss apples with flour before folding in to prevent sinking. The cake can be made dairy-free or vegan with simple swaps. Sprinkle coarse sugar on top for a crunchy crust.
- Prep Time: 20 minutes
- Cook Time: 45-55 minutes
- Category: Dessert
- Cuisine: American
Nutrition
- Serving Size: 1/10 of cake
- Calories: 230
- Sugar: 19
- Sodium: 180
- Fat: 7
- Saturated Fat: 4
- Carbohydrates: 38
- Fiber: 2
- Protein: 3
Keywords: apple cake, autumn dessert, vintage cake, easy apple cake, homemade cake, cinnamon apple cake, fall baking, comfort food