Introduction
Let me tell you, the first time I bit into a Chicago-style apple slice, I knew I was hooked. That flaky pastry, the tender apples, and the swoosh of creamy icing—it’s a Midwest classic that’s got soul. There’s something magical about how these apple bars manage to taste like the best parts of both pie and cake. Honestly, I first discovered Chicago-style apple slices at a tiny bakery off Kedzie Avenue, where the scent of cinnamon and apples would hit you the moment you walked in.
I’ve made this recipe so many times I could probably do it in my sleep (but don’t worry, I measure everything out for you!). It’s become a staple at our family gatherings—especially in the fall when apples are at their peak. But let’s face it, nobody’s stopping you from making these bars in the middle of summer, either. The creamy icing on top is my own twist, inspired by memories of those bakery slices dripping with sweet glaze.
Why do I love this recipe? For starters, these Chicago-style apple slices are way easier than a traditional pie. Plus, they’re perfect for sharing. Busy parents, sweet-toothed teens, and picky eaters all seem to agree—these bars hit the spot. If you’ve ever wanted a dessert that looks impressive but doesn’t require hours of fussing, this is it. I’ve tested and tweaked this recipe a dozen times, and I promise you’ll get bakery-worthy apple bars right from your own oven.
Why You’ll Love This Recipe
- Quick & Easy: You can whip these apple slices up in about an hour, making them perfect for last-minute gatherings or weeknight desserts.
- Simple Ingredients: No need to hunt down fancy stuff—just apples, flour, sugar, butter, and a few pantry basics.
- Perfect for Any Occasion: Whether it’s brunch, a school bake sale, or your next holiday party, Chicago-style apple slices always steal the show.
- Crowd-Pleaser: Kids love the sweet, creamy icing, and adults appreciate that nostalgic bakery flavor. They disappear fast!
- Unbelievably Delicious: The combo of tender apples, flaky crust, and rich icing is pure comfort food.
What sets my version of Chicago-style apple slices apart is the extra-creamy icing (I use a touch of cream cheese for tang) and a pastry crust that’s just the right balance of flaky and sturdy. I’ve experimented with layering techniques to keep the apples juicy without making the crust soggy. Trust me, this isn’t just another apple bar recipe—it’s the one you’ll want to make again and again.
There’s something about biting into these bars that makes you close your eyes and savor every moment. It’s like eating a slice of apple pie with your hands—but better. I love serving them when friends come over for coffee or packing them in lunch boxes for a sweet treat. If you’ve ever wanted to impress without the stress, these apple slices are your golden ticket.
Ingredients Needed
This recipe uses simple, wholesome ingredients to deliver bold flavor and satisfying texture without the fuss. Most of these are pantry staples, and you can swap a few things to fit your needs.
For the Pastry Crust:
- 2 1/2 cups (315g) all-purpose flour
- 1/2 teaspoon salt
- 1 cup (226g) unsalted butter, cold and cubed (adds flakiness)
- 1/3 cup (70g) granulated sugar
- 2 large eggs (room temperature)
- 1 teaspoon vanilla extract
- 2-3 tablespoons cold water (for adjusting dough texture)
For the Apple Filling:
- 6 medium apples, peeled, cored, and thinly sliced (about 2 1/2 pounds or 1.1kg; I like Granny Smith for tartness, but Honeycrisp works too)
- 1/2 cup (100g) granulated sugar
- 1/2 cup (100g) brown sugar (for deeper flavor)
- 2 tablespoons (16g) all-purpose flour (helps thicken the filling)
- 1 teaspoon ground cinnamon
- 1/4 teaspoon ground nutmeg (optional, adds warmth)
- Pinch of salt
- 1 tablespoon lemon juice (keeps apples bright)
For the Creamy Icing:
- 1 cup (120g) powdered sugar
- 2 tablespoons (30g) cream cheese, softened (for tang)
- 2 tablespoons (30ml) milk (use dairy-free if needed)
- 1/2 teaspoon vanilla extract
- Pinch of salt
Ingredient Tips: For best results, use apples that are firm and not too sweet. If you need gluten-free, swap the flour for a 1:1 gluten-free baking blend. You can substitute coconut oil for butter in the crust if you’re dairy-free (it’ll be a bit less flaky, but still tasty!). I’ve tried making these with pears in winter—delicious, but apples really shine here. For the icing, you can leave out cream cheese if you want a classic sweet glaze.
I usually buy my apples from the farmer’s market in fall, but supermarket apples work just fine. If you’re in a rush, pre-sliced apples are a lifesaver. And for the vanilla, I recommend Nielsen-Massey for the richest flavor.
Equipment Needed
- Mixing bowls (medium and large)
- Pastry cutter or food processor (for cutting butter into flour; two forks work in a pinch)
- 9×13-inch (23x33cm) baking pan
- Rolling pin (or use a clean wine bottle if you don’t have one—been there, done that!)
- Sharp knife (for slicing apples)
- Measuring cups and spoons
- Whisk (for icing)
- Rubber spatula or spoon
- Parchment paper (makes cleanup way easier)
If you don’t have a pastry cutter, a food processor works wonders—just pulse the butter and flour until crumbly. I’ve even used my hands in a pinch, though things get messy! For budget-friendly options, Wilton and Pyrex make durable baking pans. And if you’re worried about sticking, parchment paper is your best friend. After a few ruined crusts, I never skip it.
Preparation Method
- Prepare the Crust: In a large mixing bowl, combine 2 1/2 cups (315g) flour, 1/2 teaspoon salt, and 1/3 cup (70g) sugar. Toss in 1 cup (226g) cold butter cubes. Using a pastry cutter (or two forks), cut the butter into the flour until the mixture resembles coarse crumbs. This takes about 3-5 minutes. You want pea-sized bits of butter—this makes the crust flaky.
- Add Wet Ingredients: Beat 2 eggs with 1 teaspoon vanilla extract. Pour into the flour mixture. Add 2 tablespoons cold water and mix until dough begins to come together. If it’s too dry, add another tablespoon water. Knead gently just until combined.
- Divide and Chill: Split dough into two balls. Flatten each into a disk, wrap in plastic, and chill for at least 20 minutes. Chilling helps prevent shrinkage and sticking.
- Prepare the Filling: Peel, core, and thinly slice 6 apples. Place in a large bowl. Toss with 1/2 cup (100g) granulated sugar, 1/2 cup (100g) brown sugar, 2 tablespoons (16g) flour, 1 teaspoon cinnamon, 1/4 teaspoon nutmeg, pinch of salt, and 1 tablespoon lemon juice. Mix well—apples should be evenly coated. Let sit for 10 minutes (they’ll get juicy!).
- Preheat Oven: While apples rest, preheat your oven to 375°F (190°C). Line a 9×13-inch (23x33cm) pan with parchment paper.
- Roll Out Dough: On a lightly floured surface, roll one dough disk into a rectangle about 9×13 inches (23x33cm). Transfer to the pan, pressing gently to fit. Patch any tears with extra dough scraps.
- Layer Filling: Spoon the apple mixture evenly over crust, spreading apples in a single layer. Pour any juices over—don’t waste that flavor!
- Add Top Crust: Roll second dough disk into a rectangle and place over apples. (It’s okay if it cracks; just patch it.) Trim edges if needed. Prick top crust a few times with a fork for venting.
- Bake: Bake for 40-45 minutes, until top is golden and filling bubbles at the edges. Rotate pan halfway for even browning. If top browns too quickly, tent loosely with foil.
- Cool Completely: Let bars cool in the pan for at least 30 minutes. The filling will set as it cools—don’t rush this step.
- Make the Icing: In a medium bowl, whisk together 1 cup (120g) powdered sugar, 2 tablespoons (30g) cream cheese, 2 tablespoons (30ml) milk, 1/2 teaspoon vanilla extract, and a pinch of salt until smooth and creamy. If too thick, add a splash more milk.
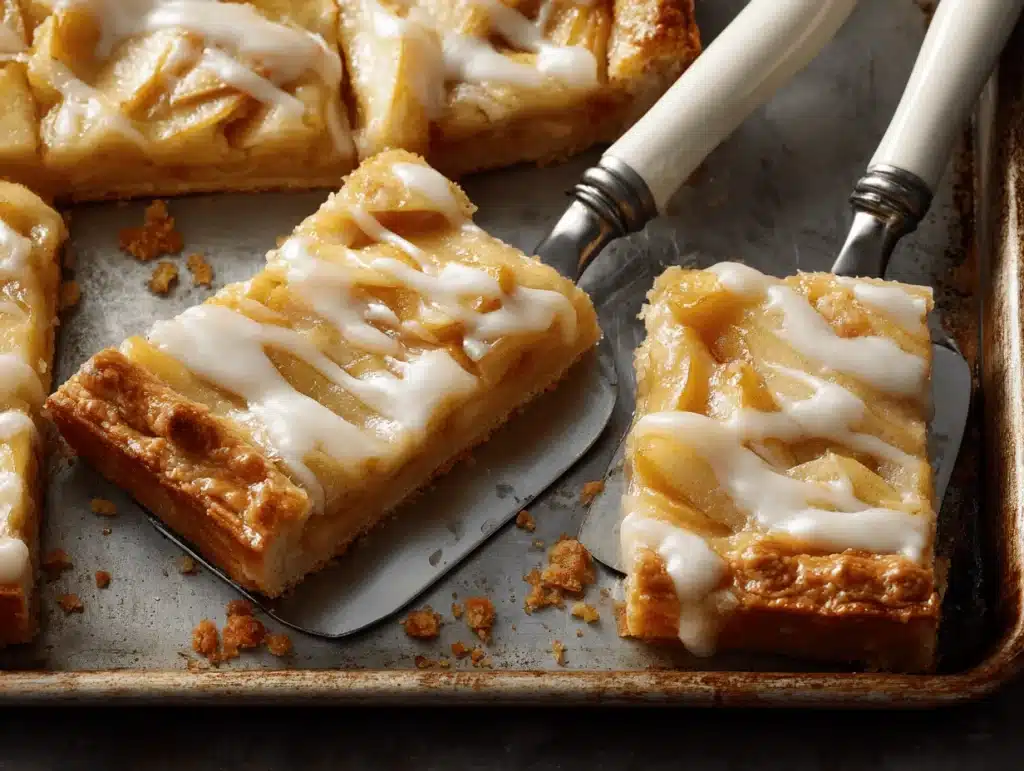
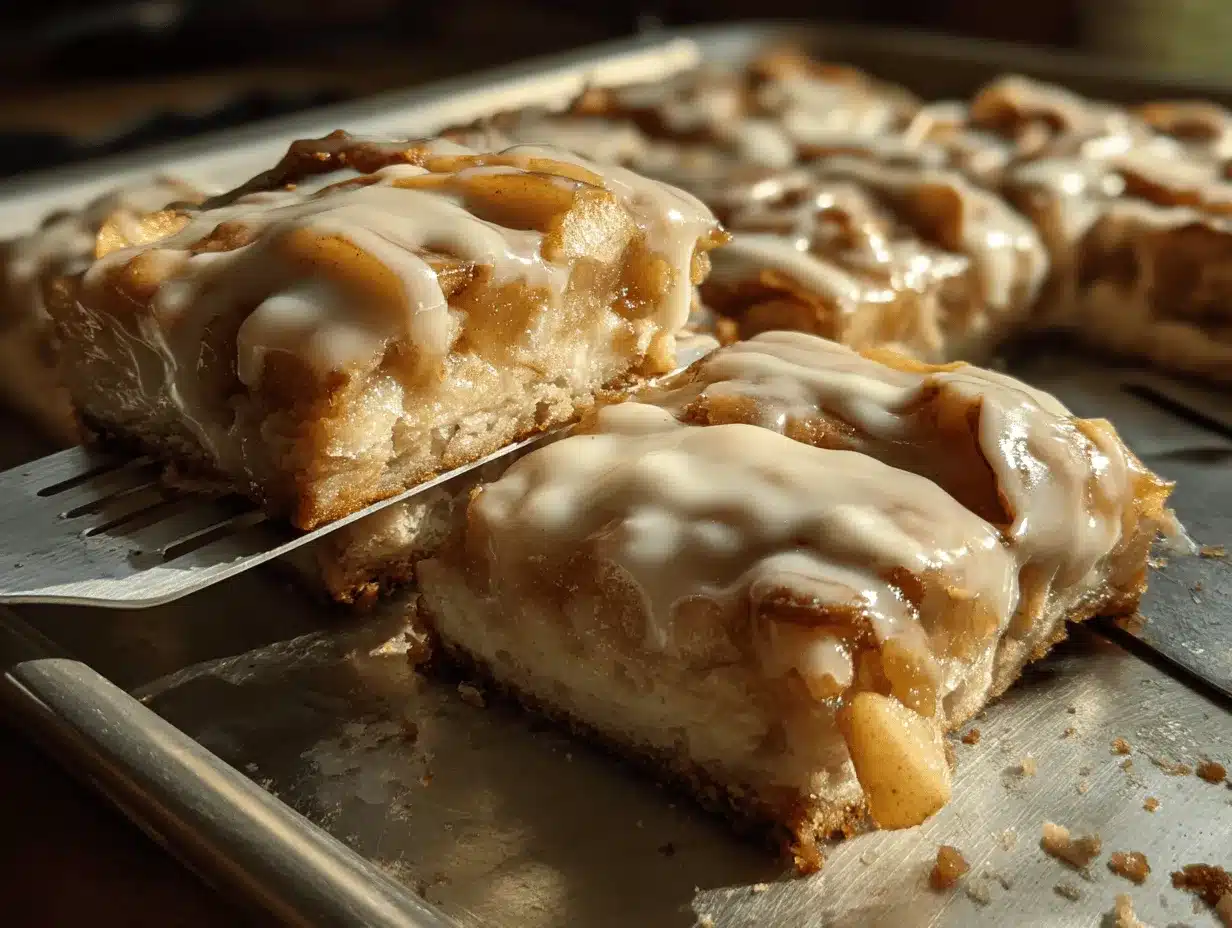
- Ice and Slice: Drizzle icing over cooled bars. Use a spatula to spread if you want a thicker layer. Cut into squares or bars (I like 2×3-inch pieces).
Troubleshooting: If the dough sticks, chill it longer or dust with more flour. If apples release too much juice, add an extra tablespoon flour to the filling. Crust cracks? Patch with extra dough—rustic is good! Bars too soft to slice? Chill them for 15 minutes before cutting.
My best tip: Don’t rush the cooling. Warm bars are tasty but tend to fall apart. Patience pays off!
Cooking Tips & Techniques
Here’s what I’ve learned after many batches of Chicago-style apple slices (and a few flops along the way):
- Keep Ingredients Cold: Cold butter means a flakier crust. If your kitchen is warm, pop everything in the fridge for a few minutes before starting.
- Thin Apple Slices: Thinner slices bake evenly and keep the bars neat. Thick slices can make the filling chunky and uneven.
- Don’t Overwork the Dough: Too much mixing leads to tough crust. Mix just until combined—lumpy is okay!
- Vent the Top Crust: A few fork pricks let steam escape and prevent soggy bottoms.
- Rotate the Pan: Halfway through baking, rotate the pan for even browning. I once forgot and had bars that were half pale, half golden!
- Don’t Skimp on Icing: If you love icing as much as I do, double the batch. Bars with extra icing are a hit at parties.
Common mistakes? I’ve accidentally used warm butter, and the crust turned out dense. Also, don’t slice while hot—trust me, patience is key. For multitasking, prep apples while the dough chills. And if you’re short on time, you can make crust and filling ahead of time. Just assemble and bake when you’re ready.
Consistency comes from measuring ingredients properly and using parchment paper for easy removal and less mess. Each time you make these bars, you’ll get a little better. And honestly, sometimes the “imperfect” ones taste best!
Variations & Adaptations
- Gluten-Free: Use a 1:1 gluten-free flour blend in the crust and filling. The texture is slightly softer, but still delicious.
- Vegan: Swap butter for coconut oil and eggs for flax eggs (1 tablespoon ground flax + 2.5 tablespoons water per egg). Use plant-based milk and skip the cream cheese in icing.
- Seasonal Fruit: Try pears or peaches instead of apples for a summer twist. I’ve made these with a mix of apples and raspberries in early fall—so good!
For flavor lovers, add a handful of chopped walnuts or pecans to the filling, or sprinkle oats on top for a crumble effect. If you want extra spice, add 1/2 teaspoon ground ginger or cardamom. For a caramel vibe, drizzle caramel sauce over the icing. If you have nut allergies, skip any nuts and double-check all ingredient labels.
I personally love swapping half the apples for tart cherries when they’re in season. That sweet-tart combo is next-level. And if you’re in a rush, use store-bought pie crust—nobody will judge!
Serving & Storage Suggestions
Chicago-style apple slices taste best at room temperature or slightly warm. For a pretty presentation, slice bars and drizzle icing just before serving so it stays shiny. Add a sprinkle of cinnamon or powdered sugar if you’re feeling fancy.
Pair these bars with coffee, hot tea, or even a scoop of vanilla ice cream for dessert. At brunch, they’re perfect with scrambled eggs or a fruit salad. For parties, arrange slices on a platter lined with parchment for easy grabbing.
To store, keep apple slices in an airtight container at room temperature for up to two days. For longer storage, refrigerate for up to five days—just let them come to room temp before serving for best texture. Freeze bars (without icing) tightly wrapped for up to two months. Thaw overnight and ice before serving. Reheat slices in the microwave for 10-15 seconds or warm in a low oven (300°F/150°C) for 5 minutes. The flavors deepen after a day, so leftovers are extra tasty!
Nutritional Information & Benefits
Each Chicago-style apple slice (based on 24 bars per pan) has roughly 180 calories, 6g fat, 29g carbs, and 2g protein. The apples pack fiber and vitamin C, while the crust gives a bit of energy for your day. Using brown sugar adds minerals like potassium and calcium, too.
If you swap for gluten-free flour or coconut oil, these bars can fit a variety of diets. Apples are naturally low in fat and high in antioxidants. The creamy icing is sweet, so enjoy in moderation if you’re watching sugar. Allergens include wheat, dairy, and eggs (unless adapted). When I want a lighter treat, I use half the sugar and skip the icing—still delicious but less indulgent!
Conclusion
If you’re craving a dessert that’s easy to make, crowd-pleasing, and just plain comforting, Chicago-style apple slices are your answer. These homemade apple bars combine juicy apples, flaky pastry, and a dreamy icing for a treat that feels like a bakery classic—but better because it’s made by you.
I love sharing this recipe because it’s so forgiving—customize it to suit your taste, swap ingredients if needed, and don’t stress about perfect crusts. Every batch tells its own story. Honestly, there’s nothing like watching friends and family smile after that first bite.
Give these apple slices a try and let me know how yours turn out! Drop your tweaks or topping ideas in the comments, share with fellow dessert fans, or tag your creations on social media. Happy baking—I can’t wait to hear your stories!
FAQs
Can I use store-bought pie crust instead of homemade?
Absolutely! Store-bought crust works fine and saves time. Just roll it to fit your pan and continue as usual.
What kind of apples are best for Chicago-style apple slices?
I recommend Granny Smith for tartness or Honeycrisp for sweetness, but any firm apple will work. Mixing varieties gives great flavor, too.
How do I make these bars gluten-free?
Use a 1:1 gluten-free flour blend in place of regular flour for both the crust and filling. The bars will be a bit softer but still yummy.
Can I freeze Chicago-style apple slices?
Yes! Freeze bars (without icing) wrapped tightly for up to two months. Thaw overnight, then ice before serving for best texture.
Why is my crust tough or dry?
Usually, it’s from overmixing or not enough butter. Mix just until combined and keep ingredients cold for a tender, flaky crust.
Pin This Recipe!
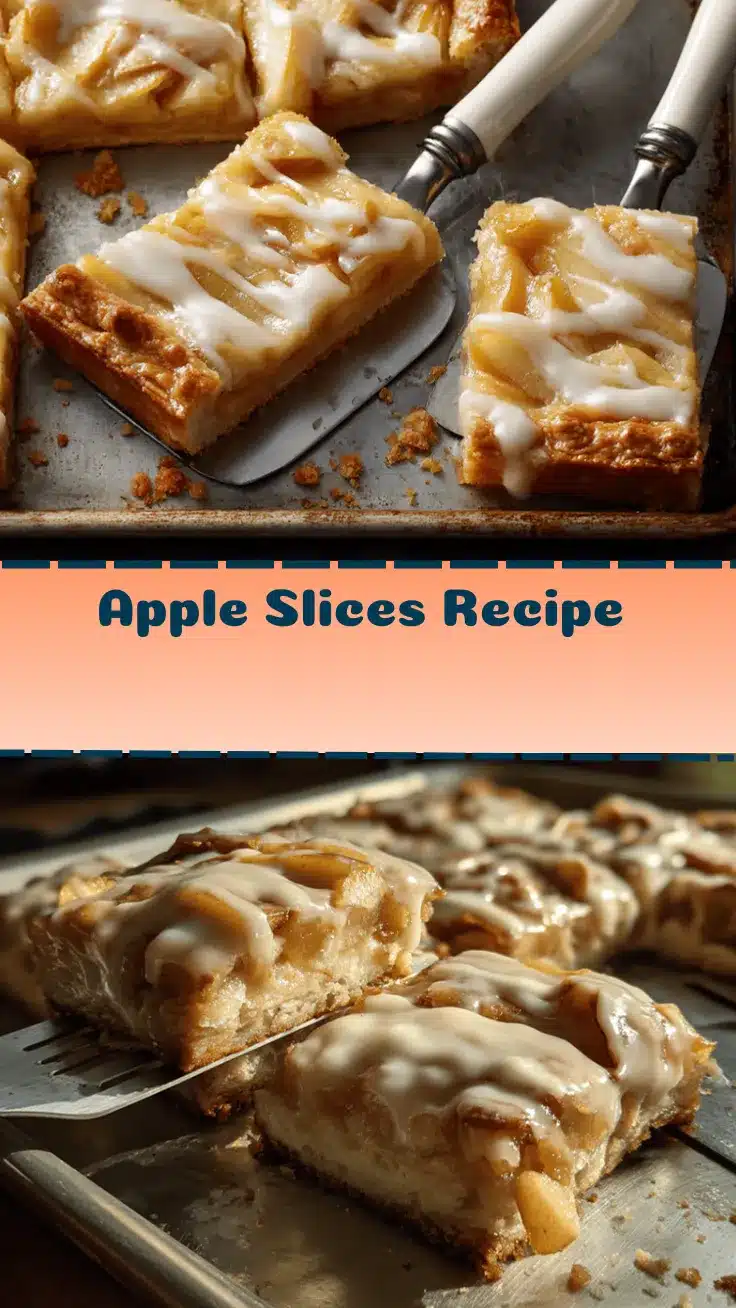

Chicago-Style Apple Slices Recipe: Easy Homemade Bars with Creamy Icing
- Total Time: 1 hour 10 minutes
- Yield: 24 bars 1x
Description
These Chicago-style apple slices feature a flaky pastry crust, tender apple filling, and a creamy icing for a nostalgic Midwest dessert bar that’s easier than pie and perfect for sharing.
Ingredients
- 2 1/2 cups all-purpose flour
- 1/2 teaspoon salt
- 1 cup unsalted butter, cold and cubed
- 1/3 cup granulated sugar
- 2 large eggs, room temperature
- 1 teaspoon vanilla extract
- 2–3 tablespoons cold water
- 6 medium apples, peeled, cored, and thinly sliced (about 2 1/2 pounds)
- 1/2 cup granulated sugar
- 1/2 cup brown sugar
- 2 tablespoons all-purpose flour
- 1 teaspoon ground cinnamon
- 1/4 teaspoon ground nutmeg (optional)
- Pinch of salt
- 1 tablespoon lemon juice
- 1 cup powdered sugar
- 2 tablespoons cream cheese, softened
- 2 tablespoons milk
- 1/2 teaspoon vanilla extract
- Pinch of salt
Instructions
- In a large mixing bowl, combine flour, salt, and sugar. Add cold butter cubes and cut into the flour using a pastry cutter or two forks until the mixture resembles coarse crumbs (about 3-5 minutes).
- Beat eggs with vanilla extract. Pour into the flour mixture. Add 2 tablespoons cold water and mix until dough begins to come together. Add another tablespoon water if needed. Knead gently just until combined.
- Divide dough into two balls, flatten each into a disk, wrap in plastic, and chill for at least 20 minutes.
- Peel, core, and thinly slice apples. Toss in a large bowl with granulated sugar, brown sugar, flour, cinnamon, nutmeg, pinch of salt, and lemon juice. Mix well and let sit for 10 minutes.
- Preheat oven to 375°F (190°C). Line a 9×13-inch baking pan with parchment paper.
- On a lightly floured surface, roll one dough disk into a rectangle about 9×13 inches. Transfer to the pan, pressing gently to fit. Patch any tears with extra dough.
- Spoon the apple mixture evenly over the crust, spreading apples in a single layer. Pour any juices over the apples.
- Roll the second dough disk into a rectangle and place over apples. Trim edges if needed. Prick top crust a few times with a fork for venting.
- Bake for 40-45 minutes, until top is golden and filling bubbles at the edges. Rotate pan halfway for even browning. Tent loosely with foil if top browns too quickly.
- Let bars cool in the pan for at least 30 minutes.
- In a medium bowl, whisk together powdered sugar, cream cheese, milk, vanilla extract, and a pinch of salt until smooth and creamy. Add a splash more milk if too thick.
- Drizzle icing over cooled bars. Use a spatula to spread if desired. Cut into squares or bars.
Notes
Keep ingredients cold for a flaky crust. Thinly slice apples for even baking. Don’t overwork the dough. Vent the top crust with a fork. Rotate pan halfway through baking for even browning. Let bars cool completely before icing and slicing. For gluten-free, use a 1:1 gluten-free flour blend. For vegan, substitute coconut oil for butter, flax eggs for eggs, and plant-based milk.
- Prep Time: 25 minutes
- Cook Time: 45 minutes
- Category: Dessert
- Cuisine: American
Nutrition
- Serving Size: 1 bar (1/24th of pan)
- Calories: 180
- Sugar: 16
- Sodium: 90
- Fat: 6
- Saturated Fat: 3
- Carbohydrates: 29
- Fiber: 2
- Protein: 2
Keywords: apple bars, Chicago-style apple slices, Midwest dessert, apple pastry, creamy icing, easy apple bars, homemade apple bars, bakery apple slices