Introduction
The smell of bubbling cheese and spicy pepperoni wafting from the oven—honestly, nothing gets my family racing to the kitchen faster. I first made these cheesy pepperoni pizza sliders for a last-minute game night, and they completely stole the show. You know that moment when you bite into something warm and gooey, and it feels like all is right in the world? That’s exactly what these sliders deliver. They’re the kind of party food you make once and then get begged for at every gathering afterward.
It started as a twist on classic pizza because, let’s face it, homemade pizza can sometimes be a hassle—rolling dough, prepping toppings, and waiting for the perfect crust. But with these pizza sliders, you get all the best parts of pizza (hello, stretchy mozzarella and crispy pepperoni!) packed into soft, buttery rolls. As a busy home cook who loves fuss-free recipes, I can honestly say this cheesy pepperoni pizza sliders recipe is my answer to stress-free party food. And if you’re feeding picky kids or hungry teens, trust me, you’ll want to make a double batch.
What makes these sliders irresistible isn’t just the flavor—it’s the convenience. You can prep them in advance, bake them up in minutes, and serve them with zero drama. Plus, you get that classic pizza vibe with a fun, shareable twist. After dozens of test runs (including one where I accidentally burnt the cheese and still got compliments!), I’m convinced these are the ultimate easy party food. Whether you’re hosting a movie night, birthday bash, or just craving a cozy snack, cheesy pepperoni pizza sliders are a guaranteed hit. Let’s dig into why you’ll love them as much as I do.
Why You’ll Love This Recipe
If you’ve ever found yourself scrambling for a crowd-pleasing snack, cheesy pepperoni pizza sliders are your new best friend. Over the years, I’ve made sliders for everything from lazy Sundays to wild birthday parties, and these consistently get rave reviews. Here’s why they’re a must-make:
- Quick & Easy: Ready in under 30 minutes—no kneading, no waiting. Perfect for last-minute get-togethers or when the game starts in five!
- Simple Ingredients: You probably have everything you need in your fridge or pantry. No complicated shopping lists here.
- Perfect for Parties: These pizza sliders are made for sharing. Just pull apart and serve—no slicing needed.
- Crowd-Pleaser: Kids, teens, adults—everyone fights over these. I’ve never had leftovers, and that’s saying something.
- Unbelievably Delicious: The combination of gooey cheese, zesty pepperoni, and soft rolls is pure comfort food magic.
What sets this cheesy pepperoni pizza sliders recipe apart is the technique: layering cheese under and over the pepperoni, and brushing the rolls with a savory garlic butter. It locks in moisture and flavor, so each bite is melty and satisfying. Plus, you can customize them to fit any taste or dietary need. I’ve tried swapping in turkey pepperoni, adding jalapeños, and even slipping in some veggies—always a winner.
These sliders aren’t just another version of pizza. They’re the kind of food you remember, the one you crave when you want something comforting but don’t want to fuss. Whether you’re impressing guests or just treating yourself, pizza sliders bring all the joy of pizza—fast and easy, with a little party magic in every bite.
Ingredients Needed
This recipe keeps things simple, using classic ingredients you can grab from any grocery store (or probably already have on hand). Here’s what you’ll need for cheesy pepperoni pizza sliders:
- Slider rolls (12 count) – Soft dinner rolls work best; I use Hawaiian rolls for a touch of sweetness.
- Pizza sauce (1 cup / 240g) – Jarred or homemade, just pick one you love. I like Rao’s for its rich flavor.
- Mozzarella cheese (2 cups / 225g, shredded) – The stretchier the better. Pre-shredded is fine for busy days.
- Pepperoni slices (24-36 slices) – I go classic with Hormel, but turkey or veggie pepperoni works too.
- Parmesan cheese (1/4 cup / 25g, grated) – Adds a salty punch (skip for dairy-free).
- Unsalted butter (1/4 cup / 60g, melted) – For the glorious garlic butter topping.
- Garlic powder (1/2 tsp / 2g) – Gives the butter a savory kick.
- Dried Italian herbs (1 tsp / 2g) – Oregano, basil, or a mix—whatever you have.
- Fresh parsley (optional, chopped, for garnish) – Adds color and a fresh bite.
Ingredient Tips:
- For gluten-free: Use gluten-free rolls (Udi’s brand is my go-to).
- For dairy-free: Substitute vegan mozzarella and butter. Miyoko’s makes a great plant-based cheese.
- If you’re out of pizza sauce, mix tomato paste with a splash of olive oil, garlic powder, and oregano.
- Want a spicier kick? Toss in some crushed red pepper flakes or sliced jalapeños between layers.
- If you have leftover deli meats, swap half the pepperoni for ham or cooked sausage.
- For veggie lovers, sneak in chopped bell peppers, spinach, or mushrooms. Just sauté them first to avoid soggy sliders.
I’ve experimented with dozens of variations, and honestly, the core ingredients are flexible. The main thing is balancing salty, cheesy, and savory flavors in every bite.
Equipment Needed
Making cheesy pepperoni pizza sliders doesn’t require fancy tools—just a few kitchen basics:
- 9×13-inch baking dish (or similar size) – Glass or metal both work. I’ve used ceramic, too, with great results.
- Chef’s knife – For slicing the rolls horizontally. A serrated bread knife helps keep things neat.
- Small mixing bowl – For stirring up the garlic butter topping.
- Pastry brush – Handy for evenly spreading the butter mixture. If you don’t have one, use a spoon.
- Measuring cups and spoons – For accuracy (and less guesswork).
- Foil – Optional, for covering the dish while baking to prevent the cheese from browning too fast.
If you’re on a budget, I’ve made these sliders using a disposable foil pan at parties—zero cleanup! For the knife, just make sure it’s sharp enough to slice rolls without squishing them. And don’t forget to keep your baking dish greased, so nothing sticks (learned that the hard way after scrubbing melted cheese for an hour).
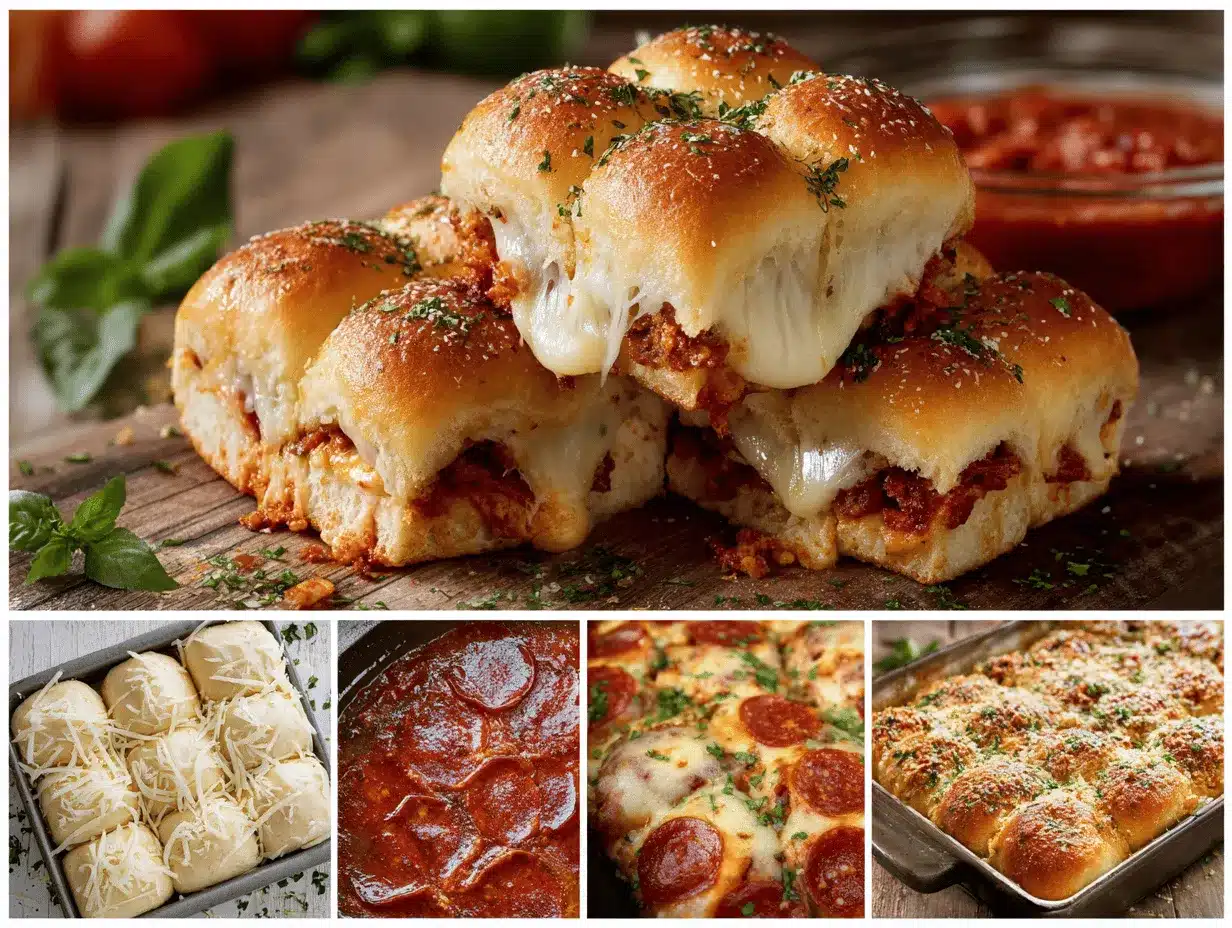
Preparation Method
- Preheat the oven to 350°F (175°C). Set your oven rack in the middle position for even heating.
- Prepare the baking dish: Lightly grease a 9×13-inch pan with butter or nonstick spray. This keeps sticking to a minimum and makes serving easier.
- Slice the slider rolls: Using a sharp serrated knife, slice all 12 rolls in half horizontally without separating them. Keep the top and bottom halves intact as slabs—like a giant sandwich.
- Arrange the bottom halves: Place the bottom slab of rolls in the greased baking dish. Press gently to flatten if needed.
- Spread pizza sauce: Spoon about 1 cup (240g) of pizza sauce evenly over the rolls. Use the back of a spoon for a smooth layer. If you like extra sauce, add a bit more—but not too much, or things get soggy.
- Layer the cheese: Sprinkle half of the shredded mozzarella (about 1 cup/112g) over the sauce. Make sure it goes all the way to the edges for maximum gooeyness.
- Add the pepperoni: Layer 24-36 slices of pepperoni over the cheese. Overlap them slightly so every slider gets some. Add more or less pepperoni based on your crowd’s taste.
- Sprinkle Parmesan: Scatter 1/4 cup (25g) grated Parmesan over the pepperoni for a salty, cheesy kick.
- Repeat cheese layer: Add the remaining mozzarella cheese (1 cup/112g) on top of the pepperoni. This double layer helps everything melt together.
- Top with rolls: Carefully place the top slab of rolls over the filling, lining up with the bottom half.
- Make garlic butter: In a small bowl, mix 1/4 cup (60g) melted unsalted butter, 1/2 teaspoon (2g) garlic powder, and 1 teaspoon (2g) dried Italian herbs. Stir well.
- Brush the topping: Use a pastry brush to generously coat the tops of the rolls with the garlic butter mixture. Don’t skimp—it makes the crust golden and flavorful.
- Cover and bake: Loosely cover the baking dish with foil. Bake for 15 minutes, then remove the foil and bake another 5-7 minutes, until the cheese is melted and the tops are golden brown.
- Check for doneness: The sliders should be bubbling around the edges, and the tops should feel slightly crisp to the touch. If the cheese isn’t melty enough, bake for a few extra minutes uncovered.
- Cool and garnish: Let the sliders sit for 2-3 minutes before cutting. Sprinkle with fresh parsley if you like.
- Serve: Slice or pull apart the sliders. Serve warm for best results!
Preparation Notes: If the rolls start browning too fast, tent with foil. If you notice soggy bottoms, reduce the sauce next time. For even faster assembly, prep ingredients ahead and keep refrigerated until ready to bake.
I’ve learned the hard way not to overload the filling—too much sauce or cheese can make the bottom soggy. Stick to the measurements, and you’ll get perfect, pull-apart sliders every time.
Cooking Tips & Techniques
Making cheesy pepperoni pizza sliders is pretty foolproof, but a few tricks help them turn out perfect every time. Here are my tried-and-true tips:
- Layer wisely: Spread sauce and cheese to the edges, but don’t overdo it. Too much sauce equals soggy sliders. Too little cheese, and they’re not nearly as indulgent.
- Cover while baking: Start with foil on top to keep the rolls from burning. Remove it for the last stretch to crisp the tops. Trust me, I’ve had a few batches with burnt tops because I got distracted.
- Check for bubbling: The cheese should bubble around the edges—if it’s not, give it a couple more minutes. Undercooked sliders are just sad.
- Don’t skip the garlic butter: It adds flavor and keeps the rolls moist. If you don’t have a pastry brush, just drizzle and spread with the back of a spoon.
- Let them rest: Waiting a couple minutes before serving helps set the cheese and makes them easier to cut (learned this after burning my fingers in my impatience).
- Multitasking: Prep the garlic butter while the oven heats. Assemble the sliders while the sauce is warming—keeps things quick.
- Consistency: Use the same brand of rolls for even baking. Some rolls (like off-brand ones) can dry out or get too crunchy.
My biggest mistake? Using too much sauce and not enough cheese. It took a few party fails to figure out that good sliders are all about balance—gooey cheese, enough sauce for flavor, and buttery rolls that crisp up just right.
And don’t stress if you mess up; these are forgiving. The worst that’s happened is a bit of cheese overflow (which, let’s be honest, is kind of delicious in its own right).
Variations & Adaptations
Cheesy pepperoni pizza sliders are flexible, so you can switch things up based on your crowd or dietary needs. Here are some of my favorite ways to adapt the recipe:
- Vegetarian: Skip the pepperoni and layer in sautéed mushrooms, bell peppers, or spinach. Add olives for a Mediterranean twist.
- Gluten-Free: Use gluten-free slider rolls (Udi’s or Schär brands work well). The baking time might be a touch shorter, so keep an eye on them.
- Spicy Kick: Add sliced jalapeños or a sprinkle of crushed red pepper flakes between cheese layers. Pepper jack cheese works too!
- Dairy-Free: Swap in vegan mozzarella and butter. Violife and Miyoko’s are my personal favorites for meltability.
- Different Meats: Try cooked sausage slices, ham, or turkey pepperoni for a change.
- Sauce Swap: Use pesto instead of pizza sauce for an herby, fresh flavor.
One party, I made half the sliders with veggie toppings and half with extra pepperoni—everyone was happy! If you want to bake them in smaller batches, use an 8×8 pan and cut the recipe in half. The sliders adapt well to air fryers and toaster ovens, too—just reduce the cooking time and watch closely.
Allergen note: If you’re dealing with dairy or gluten allergies, these sliders hold up beautifully with substitutions. Just keep the sauce and toppings in check to prevent sogginess.
Serving & Storage Suggestions
Cheesy pepperoni pizza sliders are best served warm, right out of the oven. The cheese is melty, the rolls are golden, and the aroma is out of this world!
- Serving: Place the sliders on a pretty platter or serve straight from the baking dish. Sprinkle with chopped parsley for a pop of color. Pair with a fresh green salad, garlic knots, or a big bowl of marinara for dipping.
- Beverages: Kids love these with lemonade or fruit punch; adults, try a cold beer or sparkling water.
- Storage: Leftovers (if you have any!) keep well in an airtight container in the fridge for up to 3 days. Wrap tightly to keep them from drying out.
- Freezing: You can freeze assembled, unbaked sliders for up to 2 months. Thaw overnight in the fridge, then bake as directed.
- Reheating: Warm sliders in a 350°F (175°C) oven for 10 minutes or microwave individual portions for 30-40 seconds. The oven keeps the rolls crisp; the microwave works in a pinch.
- Flavor note: The flavors actually deepen overnight, so leftovers taste even better!
For parties, I prep the sliders ahead and pop them in the oven when guests arrive. It’s a no-fuss way to get everyone fed and happy, fast.
Nutritional Information & Benefits
Each cheesy pepperoni pizza slider (based on one of 12 servings) contains approximately:
- Calories: 250-300
- Protein: 9g
- Carbohydrates: 24g
- Fat: 14g
- Sodium: 450mg
Health benefits: These sliders offer a good dose of protein from cheese and pepperoni. You can bump up fiber and nutrients by adding veggies. Using turkey pepperoni or low-fat cheese makes them lighter. For gluten-free or dairy-free diets, swap rolls and cheese as needed. Note: Contains wheat and dairy. If you’re watching sodium, pick low-sodium pizza sauce and cheese.
Personally, I love serving these as part of a balanced party spread—add a veggie tray or fruit salad for a hearty, satisfying meal that doesn’t feel heavy.
Conclusion
Cheesy pepperoni pizza sliders are more than just party food—they’re a guaranteed hit every time you make them. Fast to prep, easy to bake, and loaded with gooey cheese and spicy pepperoni, these sliders check every box for delicious comfort food. Whether you’re hosting a big celebration or just need a cozy snack for family movie night, this recipe brings people together.
Don’t be afraid to customize! Try new cheeses, add veggies, or swap meats to fit your crew’s tastes. After making these for countless parties, I can honestly say they’re my go-to for effortless entertaining. I hope you love them as much as we do—share your tweaks, leave a comment, or tag me with your slider creations!
Here’s to more easy, cheesy moments at your table. Happy baking!
Frequently Asked Questions
Can I make cheesy pepperoni pizza sliders ahead of time?
Yes! Assemble the sliders, cover tightly, and refrigerate up to 24 hours ahead. Bake when ready to serve.
What’s the best way to reheat leftover pizza sliders?
Place sliders in a 350°F (175°C) oven for 10 minutes, or microwave individual pieces for 30-40 seconds. The oven keeps the rolls crisp.
Can I freeze these pizza sliders?
Absolutely. Freeze assembled (unbaked) sliders in a covered dish up to 2 months. Thaw in the fridge overnight, then bake as directed.
How do I make these sliders vegetarian?
Skip the pepperoni and add sautéed veggies like mushrooms, bell peppers, or spinach for a veggie-packed version.
What rolls work best for pizza sliders?
Soft dinner rolls or Hawaiian rolls are my favorite. You can use any slider-size roll, including gluten-free options.
Pin This Recipe!
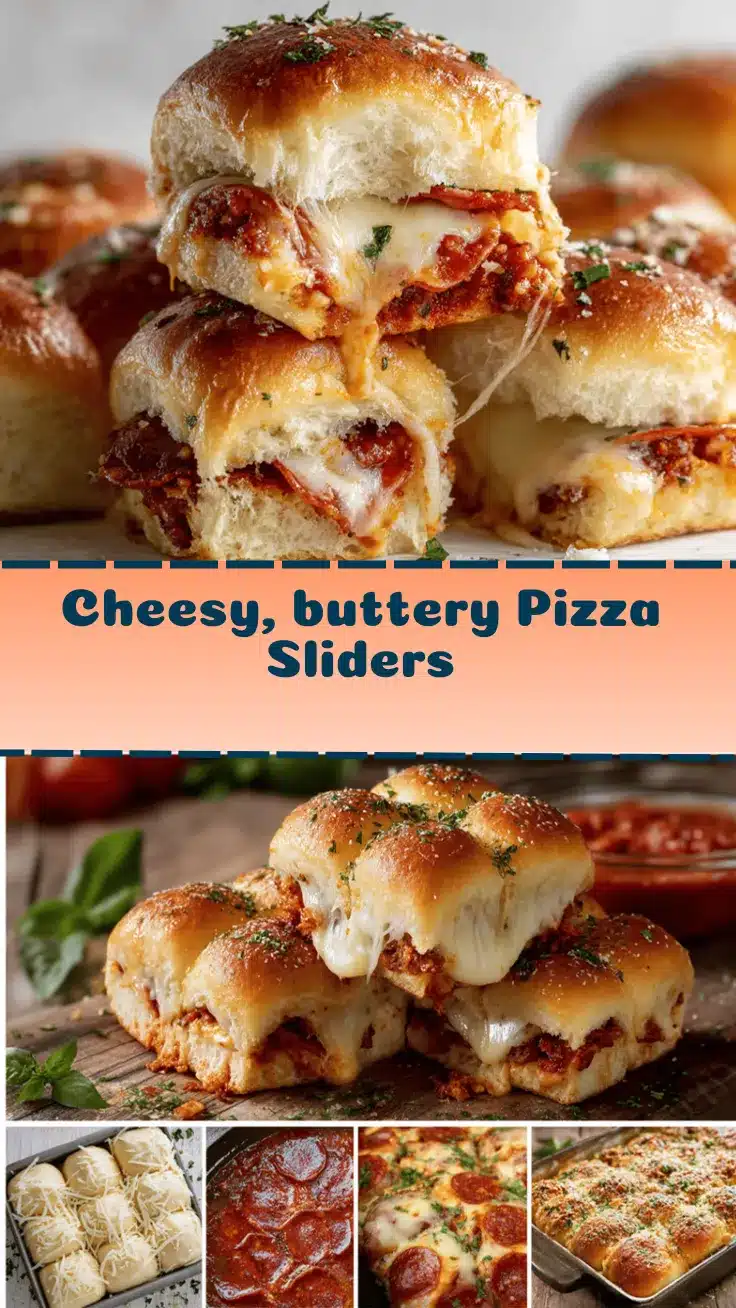
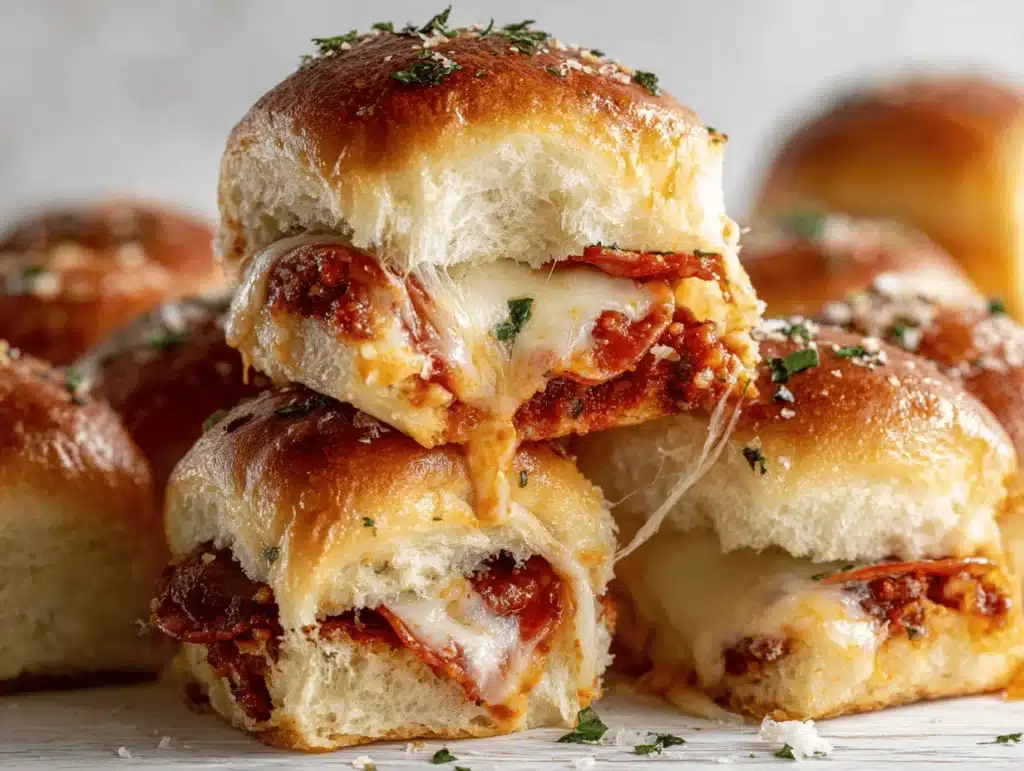
Cheesy Pepperoni Pizza Sliders
- Total Time: 32 minutes
- Yield: 12 sliders 1x
Description
These cheesy pepperoni pizza sliders are the ultimate easy party food—packed with gooey mozzarella, spicy pepperoni, and buttery rolls. Quick to prep and perfect for sharing, they deliver all the comfort of pizza in a fun, pull-apart slider format.
Ingredients
- 12 slider rolls (soft dinner rolls or Hawaiian rolls)
- 1 cup pizza sauce
- 2 cups shredded mozzarella cheese
- 24–36 slices pepperoni
- 1/4 cup grated Parmesan cheese
- 1/4 cup unsalted butter, melted
- 1/2 teaspoon garlic powder
- 1 teaspoon dried Italian herbs (oregano, basil, or a mix)
- Fresh parsley, chopped (optional, for garnish)
Instructions
- Preheat the oven to 350°F (175°C). Set oven rack in the middle position.
- Lightly grease a 9×13-inch baking dish with butter or nonstick spray.
- Using a sharp serrated knife, slice all 12 rolls in half horizontally without separating them. Keep the top and bottom halves intact as slabs.
- Place the bottom slab of rolls in the greased baking dish. Press gently to flatten if needed.
- Spoon about 1 cup of pizza sauce evenly over the rolls.
- Sprinkle half of the shredded mozzarella (1 cup) over the sauce.
- Layer 24-36 slices of pepperoni over the cheese, overlapping slightly.
- Scatter 1/4 cup grated Parmesan over the pepperoni.
- Add the remaining mozzarella cheese (1 cup) on top of the pepperoni.
- Carefully place the top slab of rolls over the filling.
- In a small bowl, mix melted butter, garlic powder, and dried Italian herbs.
- Use a pastry brush to generously coat the tops of the rolls with the garlic butter mixture.
- Loosely cover the baking dish with foil. Bake for 15 minutes, then remove the foil and bake another 5-7 minutes, until cheese is melted and tops are golden brown.
- Let the sliders sit for 2-3 minutes before cutting. Sprinkle with fresh parsley if desired.
- Slice or pull apart the sliders and serve warm.
Notes
For gluten-free, use gluten-free rolls. For dairy-free, substitute vegan cheese and butter. Don’t overload with sauce or cheese to avoid soggy bottoms. Prep ahead and refrigerate up to 24 hours before baking. For a spicier version, add jalapeños or crushed red pepper flakes. Leftovers keep well in the fridge for up to 3 days and reheat best in the oven.
- Prep Time: 10 minutes
- Cook Time: 20-22 minutes
- Category: Appetizer
- Cuisine: American
Nutrition
- Serving Size: 1 slider
- Calories: 275
- Sugar: 4
- Sodium: 450
- Fat: 14
- Saturated Fat: 7
- Carbohydrates: 24
- Fiber: 1
- Protein: 9
Keywords: pizza sliders, party food, pepperoni, cheesy sliders, easy appetizer, game day, kid friendly, comfort food, pull apart sliders