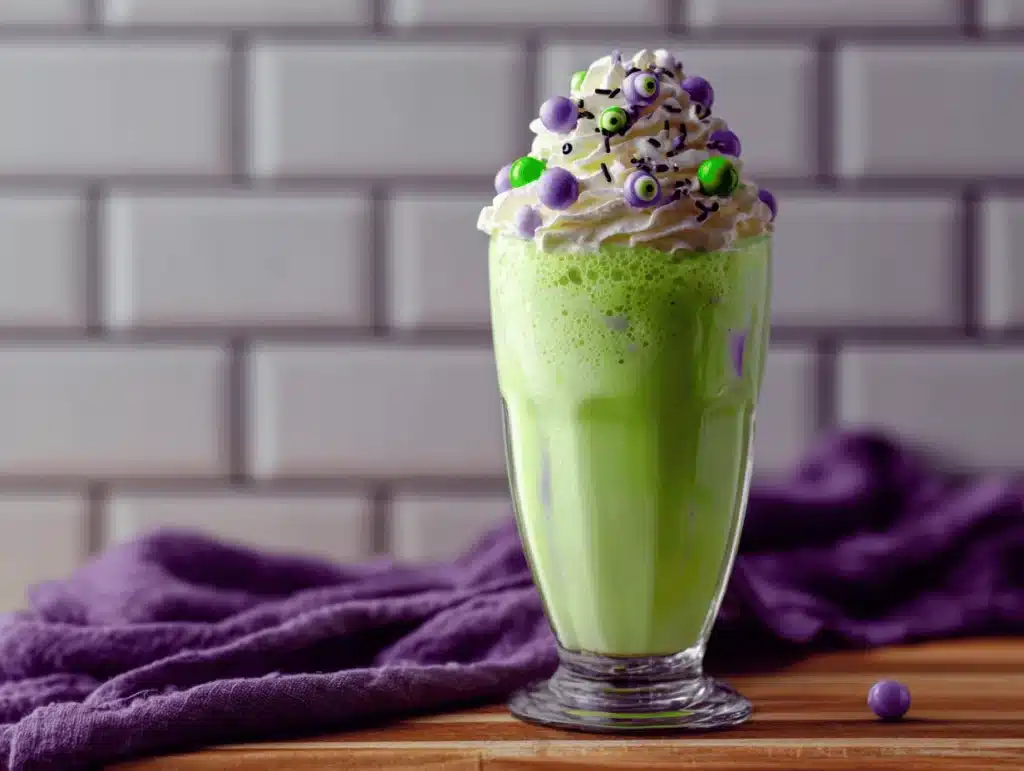
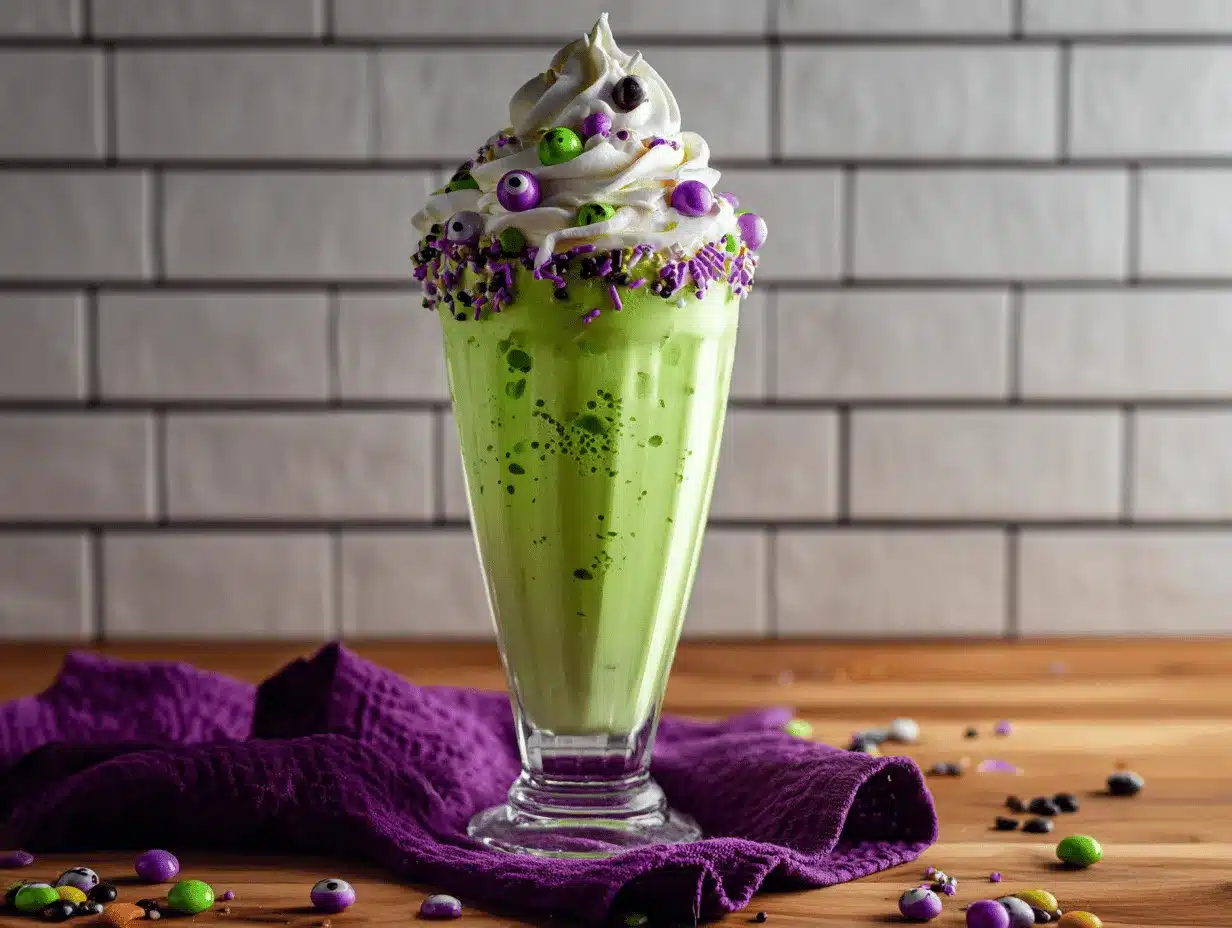
Bright swirls of purple, green, and orange—plus a mountain of whipped cream—make this Hocus Pocus Halloween Milkshake the ultimate party potion. The first time I whipped this up for my nephew’s October birthday, his friends lost their minds. Seriously, pictures were snapped before anyone took a sip (and my kitchen looked like a cauldron exploded, but that’s a story for another time!).
I’m a sucker for themed treats, and this recipe has that magic mix of nostalgia, fun, and pure sugar rush. I started making Hocus Pocus Halloween Milkshakes during a marathon movie night—when the Sanderson sisters came on screen, I wanted something sweet and silly to serve. The result? A spooky, vibrant shake that’s now a tradition in our house every October.
Why do I keep coming back to this recipe? It’s fast, easy, and totally customizable. You can grab everything at the grocery store (no hunting for eye of newt or rare candy melts). Plus, if you love sharing Pinterest-worthy party treats, this milkshake is an absolute showstopper. Whether you’re wrangling a crowd of sugar-crazed kids or just want a cozy night in with a little movie magic, the Hocus Pocus Halloween Milkshake delivers every time. I’ve tested different combos, tried vegan swaps, and even experimented with wild toppings (gummy worms, anyone?). Each time, it’s a hit—and honestly, nothing says “Halloween” like a glass of creamy, colorful fun.
Why You’ll Love This Recipe
- Quick & Easy: Whips up in less than 10 minutes—just blend, decorate, and serve. Perfect for last-minute parties or movie nights!
- Simple Ingredients: No fancy stuff required. Ice cream, milk, food coloring, and a few festive toppings—most folks have these on hand.
- Perfect for Parties: Ideal for kids’ Halloween parties, sleepovers, or any time you want to add a little spooky sparkle to your table.
- Crowd-Pleaser: Kids go wild for the crazy colors (trust me, mine beg for seconds), and adults get a kick out of the nostalgia.
- Unbelievably Delicious: Creamy, sweet, and loaded with flavor. The swirl of orange creamsicle, berry, and vanilla is just plain fun.
This isn’t your average milkshake—the Hocus Pocus Halloween Milkshake stands out with its wild layers and playful toppings. My secret? Dividing the ice cream base, coloring each part, and swirling them together. The result? A magical, marbled masterpiece worthy of the Sanderson sisters.
If you’re tired of the same old Halloween snacks (looking at you, candy corn), this recipe brings something new to the table. It’s versatile, too—you can swap flavors, adjust colors, or pile on the toppings. I love how creative you can get! Whether you’re serving a crowd or just want a solo treat, it brings the party spirit. It’s one of those recipes that makes people smile—no tricks, just treats. And honestly, after the first sip, you’ll know why I keep making it year after year.
So if you want a Halloween dessert that’s easy, eye-popping, and totally delicious, this milkshake is for you. It’s comfort food in a glass—with a festive twist that’s perfect for Pinterest, parties, and plain old fun.
Ingredients Needed
This Hocus Pocus Halloween Milkshake recipe relies on classic, simple ingredients—but with a splash of spooky flair! Here’s what you’ll need for one large or two medium milkshakes:
- For the Milkshake Base:
- 3 cups vanilla ice cream (about 420g, slightly softened for easy blending)
- 1/2 cup whole milk (120ml, or use any milk you like—almond, oat, etc.)
- 1/2 cup orange sherbet (70g, for a citrusy pop—can swap for mango or peach ice cream)
- 1/2 cup berry ice cream (70g, like raspberry, blueberry, or strawberry—whatever’s on hand)
- Gel food coloring (purple, green, orange—liquid works, but gel gives deeper color)
- For Decorating & Topping:
- Whipped cream (store-bought or homemade—it’s not Halloween without a mountain on top!)
- Halloween sprinkles (look for bat shapes, stars, or classic orange/black)
- Mini marshmallows (for a cloud-like effect, totally optional)
- Gummy worms or candy eyeballs (for that spooky Sanderson sisters’ vibe)
- Chocolate syrup (for drizzling inside the glass—makes a cool effect)
- Optional Extras:
- Crushed cookies (Oreos or chocolate wafers—adds crunch and extra fun)
- Colored sugar or edible glitter (because, well, it’s Halloween!)
If you’re looking for dairy-free options, just grab your favorite non-dairy ice cream and whipped topping. I’ve made this with coconut milk ice cream and almond milk—works like a charm. For gluten-free, stick with gluten-free cookies if you’re adding crunch.
Pro tip: The best food coloring for those vivid Hocus Pocus Halloween Milkshake layers is gel-based. You only need a drop or two! If you can’t find berry ice cream, mix vanilla with a spoonful of berry jam. No orange sherbet? Just use more vanilla and add orange coloring—it’s all about the effect. And for toppings, don’t stress if you don’t have every single item. Anything colorful and fun will work. I’ve even used leftover Halloween candy in a pinch (kids loved it, parents maybe not so much!).
When you’re shopping, look for ice cream brands that scoop easily and taste creamy—my go-to is Häagen-Dazs for vanilla and Talenti for fruit flavors. For whipped cream, Reddi-wip is handy, but homemade whipped cream (with a touch of vanilla) really takes it up a notch. Halloween sprinkles are everywhere in October, but if you’re making these off-season, pastel colors work too for a “magical” twist.
Equipment Needed
You don’t need fancy tools for this Hocus Pocus Halloween Milkshake—just a few kitchen basics:
- Blender (any basic blender works—high-speed makes it extra smooth)
- Ice cream scoop (or a sturdy spoon—just let ice cream soften a bit first)
- Measuring cups and spoons (for getting those ratios right)
- Tall milkshake glasses (clear glass shows off the swirled colors—mason jars are great too)
- Long spoons or milkshake straws (for that classic diner feel)
- Small bowls (for mixing colored layers separately)
If you don’t have a blender, a food processor or even an immersion blender will do in a pinch—just blend small batches. I’ve used a hand mixer when my blender broke, and though it was a little messy, it worked!
For toppings, a piping bag makes whipped cream look extra fancy, but a zip-top bag with the corner snipped off does the trick. No milkshake glasses? Use any tall cup—just aim for something clear so the colors pop. If you’re making these for a crowd, disposable cups are a lifesaver (less cleanup, more time for fun!).
Maintenance tip: Rinse your blender immediately after use—sticky ice cream can be tough to clean if it dries. For sprinkles and candy toppings, keep a stash in airtight containers so you’re ready for last-minute party treats. I always keep a couple of backup straws and spoons on hand (because, let’s face it, kids lose them within minutes).
Preparation Method
- Prep Your Workspace: Gather all ingredients and equipment. Let ice cream soften for about 5 minutes—makes for easier scooping and smoother blending.
- Make the Milkshake Base: In your blender, add 2 cups (280g) vanilla ice cream and 1/2 cup (120ml) milk. Blend until smooth and creamy, about 30 seconds.
- Divide and Color: Pour the shake base equally into three small bowls (about 3/4 cup or 180ml each).
- To one bowl, add 1/2 cup (70g) orange sherbet and a drop of orange gel coloring. Stir until the color is vibrant.
- To the second bowl, add 1/2 cup (70g) berry ice cream and a drop of purple gel coloring. Mix well.
- To the third bowl, add a drop of green gel coloring to the vanilla base. Stir until bright green.
- Layer the Milkshake: Grab your glass and drizzle chocolate syrup along the inside walls. Starting with the orange layer, gently pour into the bottom. Next, spoon in the purple layer, then the green. For a marbled effect, swirl gently with a skewer or straw—but don’t overmix!
- Add Whipped Cream: Top with a generous swirl of whipped cream. If using a piping bag, pipe in a spiral for height. (Kids always want extra—don’t skimp!)
- Decorate: Sprinkle Halloween sprinkles, mini marshmallows, and candy eyeballs over the whipped cream. Add gummy worms for a “witchy” finish. Crush a cookie on top if you like a little crunch.
- Serve Immediately: Pop in a fun straw and serve right away—the colors and toppings look best fresh. If you’re prepping ahead, keep milkshake base in the fridge up to 1 hour, but assemble just before serving.
Troubleshooting: If layers blend together too much, chill each colored portion in the freezer for 10 minutes before layering. If the shake’s too thick, add a splash more milk. Too thin? Add more ice cream and re-blend. Taste before serving—if flavors need a boost, add a spoonful of berry jam or orange zest.
Personal tip: I always set up a “milkshake bar” for parties—let kids pick their toppings and layer colors. It gets messy, but it’s half the fun! If you’re making a big batch, keep extra ice cream and milk on hand. And don’t forget napkins—this treat is delightfully messy.
Sensory cues: The shake should be thick enough to hold whipped cream, colors should be bold (not muddy), and the smell should be sweet with a hint of fruit. The glass should feel cold to the touch—no one likes a lukewarm milkshake!
Cooking Tips & Techniques
Making the perfect Hocus Pocus Halloween Milkshake isn’t just about tossing ice cream in a blender. Here are some pro tips I’ve learned (sometimes the hard way!):
- Layering Colors: Use gel food colors for vivid layers. Mix thoroughly, but don’t overblend once colors are in the glass—otherwise, you get a brownish mess instead of Halloween magic.
- Milkshake Thickness: Start with less milk and add more only if needed. The ideal shake is thick enough to spoon but sippable through a straw. If it’s runny, toss in more ice cream and re-blend.
- Chill Everything: Keeping glasses, bowls, and ingredients cold helps layers stay separate and toppings sit pretty. Pop your glasses in the freezer for 5 minutes before assembling.
- Topping Placement: Add toppings right before serving. Whipped cream can melt fast, especially on warm days. Stack everything high for that “wow” effect, but don’t overload or it’ll topple.
- Common Mistakes: Overmixing is a classic error—colors turn murky. Another slip: too much liquid, which makes the shake soupy. (Been there!) Also, don’t skip the food coloring—pastel colors just don’t have that Halloween punch.
Lessons learned: Once, I used liquid food coloring and my milkshake turned watery and pale. Gel is the secret! I’ve also tried layering with a spoon versus pouring—spooning gives more control and neater edges. If you want picture-perfect shakes for Pinterest, take your time with layers and toppings.
Timing tip: If you’re making a lot for a party, blend each color and chill bowls ahead. Set up a “milkshake station” for quick assembly. Multitasking with toppings is fun—let kids help with sprinkles while you pour the layers.
Consistency is key: Use the same ice cream brands and milk each time for reliable results. And remember, the messier the shake, the more fun it is! Halloween is all about letting loose and enjoying the spooky chaos.
Variations & Adaptations
One of my favorite things about the Hocus Pocus Halloween Milkshake is how easy it is to customize. Here are a few wickedly fun twists:
- Dairy-Free/Vegan: Swap out regular ice cream for coconut-based or almond milk ice cream. Use non-dairy milk and vegan whipped topping. I’ve made this with So Delicious coconut ice cream—it’s super creamy!
- Flavor Swaps: Try mint ice cream for the green layer (super fresh!), or use chocolate ice cream instead of berry for a “witch’s brew” chocolate-vanilla combo. Add a dash of cinnamon or pumpkin spice for autumn warmth.
- Seasonal Additions: In the fall, mix in a spoonful of pumpkin puree with vanilla ice cream and orange coloring. For spring parties, swap colors for pastel pink, blue, and yellow—call it a “Spring Spell Milkshake.”
Different cooking methods work too. No blender? Mash ice cream with a fork and stir in milk for a chunky version (kids love the texture). Want a frozen treat? Pour layers into popsicle molds and freeze—hello, Hocus Pocus pops!
For allergen swaps, use gluten-free cookies and nut-free toppings. You can always leave out the candy eyeballs and gummy worms if someone’s sensitive to artificial dyes or gelatin.
My personal favorite adaption: I sometimes add a shot of espresso to the vanilla layer for a grown-up “witch’s brew” on movie night. (Don’t worry, I warn the kids!) The possibilities are endless—just have fun and make it your own.
Serving & Storage Suggestions
Serve your Hocus Pocus Halloween Milkshake ice-cold, right after assembly. The colors and toppings look their best when fresh—plus, the whipped cream stays fluffy and the sprinkles don’t melt into the shake.
For parties, set up a milkshake bar with bowls of toppings and let guests decorate their own. Pair with popcorn, spooky cupcakes, or salty snacks for the ultimate movie night spread. Kids love choosing their own toppings—gummy worms, candy corn, or even pretzel sticks.
If you need to prep ahead, you can blend the colored milkshake bases up to 1 hour in advance and chill them in the fridge. Assemble with toppings just before serving. Leftovers (rare, but it happens!) can be poured into popsicle molds and frozen for later—think of them as Hocus Pocus ice pops.
To store in the fridge, cover the shake tightly and keep for up to 24 hours (colors may blend, but flavor is still great). To reheat, well—don’t! This treat is strictly cold. If the shake separates, a quick blend brings it back to life.
Over time, flavors meld and get even richer, but the whipped cream and toppings are best fresh. For a fun twist, freeze leftover shake in ice cube trays and blend into future smoothies or shakes. Waste not, want not!
Nutritional Information & Benefits
| Amount per Serving | Estimate |
|---|---|
| Calories | ~450 |
| Protein | 8g |
| Fat | 16g |
| Carbohydrates | 64g |
| Fiber | 2g |
| Sugar | 48g |
Key ingredient benefits: Ice cream provides calcium and a bit of protein; berry ice cream adds antioxidants. If you use non-dairy options, you get healthy fats from coconut or almond. Sprinkles and candy? Well, they’re just for fun!
This recipe can be made gluten-free and nut-free by checking ice cream and topping labels. Allergens: Dairy (milk, ice cream, whipped cream), potentially gluten (cookies), and artificial dyes (sprinkles, food coloring). Always check packaging if you’re serving guests with allergies.
My wellness take: The Hocus Pocus Halloween Milkshake is a treat—best enjoyed in moderation. For a lighter version, use low-fat milk or frozen yogurt. But hey, Halloween only comes once a year, so go ahead and enjoy every magical sip!
Conclusion
There’s something about the Hocus Pocus Halloween Milkshake that brings out the kid in everyone. It’s colorful, messy, and just downright fun. Whether you’re hosting a big bash or just celebrating at home, this recipe is guaranteed to add a little magic to your Halloween.
Don’t be afraid to experiment—layer different flavors, pile on wild toppings, and make it your own. Honestly, half the fun is seeing what crazy combos everyone comes up with. I love this recipe for its simplicity and wow factor, and I hope you’ll enjoy it as much as my family and friends do.
So grab your blender, round up the kids, and get ready for a party treat that’s as irresistible as the Sanderson sisters themselves! If you try this Hocus Pocus Halloween Milkshake, drop a comment below, share your photos, or tag me on social—I’d love to see your spooky creations. Happy Halloween, and may your milkshakes always be magical!
FAQs
Can I make this Hocus Pocus Halloween Milkshake without a blender?
Yes! You can mash softened ice cream with a fork and stir in milk until smooth. It’ll be a bit chunkier, but still tasty and fun.
What if I don’t have gel food coloring?
Liquid food coloring works, but you’ll need more drops for bold color. The shake may be a bit less vibrant, but it’ll still look festive.
How can I make this milkshake dairy-free?
Just use your favorite plant-based ice cream, non-dairy milk, and a vegan whipped topping. Coconut and almond milk ice creams work great!
Can I prepare these milkshakes ahead of time for a party?
You can blend the base and chill the colored layers up to 1 hour before serving. Add whipped cream and toppings right before serving for best appearance.
What toppings work best for a Halloween party?
Halloween sprinkles, gummy worms, candy eyeballs, mini marshmallows, and chocolate syrup are my favorites. Get creative—anything colorful and spooky goes!
Pin This Recipe!

Hocus Pocus Halloween Milkshake
- Total Time: 10 minutes
- Yield: 1 large or 2 medium milkshakes 1x
Description
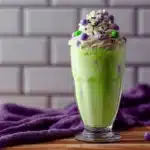
A vibrant, swirled milkshake bursting with purple, green, and orange layers, topped with whipped cream and festive Halloween candies. This easy, customizable treat is perfect for parties, movie nights, or any spooky celebration.
Ingredients
- 3 cups vanilla ice cream (about 420g), slightly softened
- 1/2 cup whole milk (120ml, or any milk of choice)
- 1/2 cup orange sherbet (70g, or mango/peach ice cream)
- 1/2 cup berry ice cream (70g, raspberry, blueberry, or strawberry)
- Gel food coloring (purple, green, orange)
- Whipped cream (store-bought or homemade)
- Halloween sprinkles
- Mini marshmallows (optional)
- Gummy worms or candy eyeballs
- Chocolate syrup
- Crushed cookies (Oreos or chocolate wafers, optional)
- Colored sugar or edible glitter (optional)
Instructions
- Gather all ingredients and equipment. Let ice cream soften for about 5 minutes.
- In a blender, add 2 cups vanilla ice cream and 1/2 cup milk. Blend until smooth and creamy, about 30 seconds.
- Divide the shake base equally into three small bowls (about 3/4 cup each).
- To one bowl, add orange sherbet and a drop of orange gel coloring. Stir until vibrant.
- To the second bowl, add berry ice cream and a drop of purple gel coloring. Mix well.
- To the third bowl, add a drop of green gel coloring to the vanilla base. Stir until bright green.
- Drizzle chocolate syrup along the inside of a tall glass. Layer the orange mixture at the bottom, then the purple, then the green. Swirl gently for a marbled effect.
- Top with a generous swirl of whipped cream.
- Decorate with Halloween sprinkles, mini marshmallows, candy eyeballs, gummy worms, and crushed cookies as desired.
- Serve immediately with a fun straw.
Notes
For best color separation, use gel food coloring and chill glasses before layering. Dairy-free and gluten-free options are easy—just swap ice cream and toppings as needed. Let kids help with toppings for a fun party activity. If making ahead, chill colored bases and assemble just before serving. For a thicker shake, use less milk; for thinner, add more. Freeze leftovers in popsicle molds for Hocus Pocus ice pops.
- Prep Time: 5 minutes
- Cook Time: 5 minutes
- Category: Dessert
- Cuisine: American
Nutrition
- Serving Size: 1 large milkshake (about 16 oz) or 2 medium milkshakes (about 8 oz each)
- Calories: 450
- Sugar: 48
- Sodium: 150
- Fat: 16
- Saturated Fat: 10
- Carbohydrates: 64
- Fiber: 2
- Protein: 8
Keywords: Halloween milkshake, party treat, kids dessert, Hocus Pocus, colorful milkshake, easy milkshake, Halloween recipe, movie night treat, festive dessert, milkshake bar