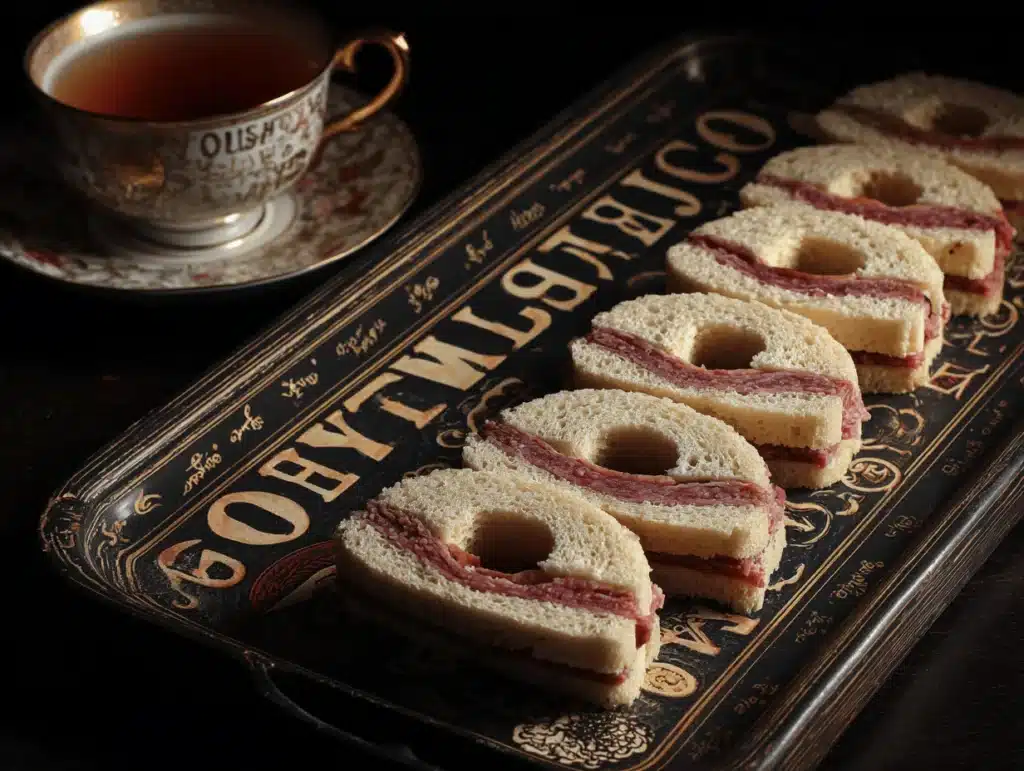
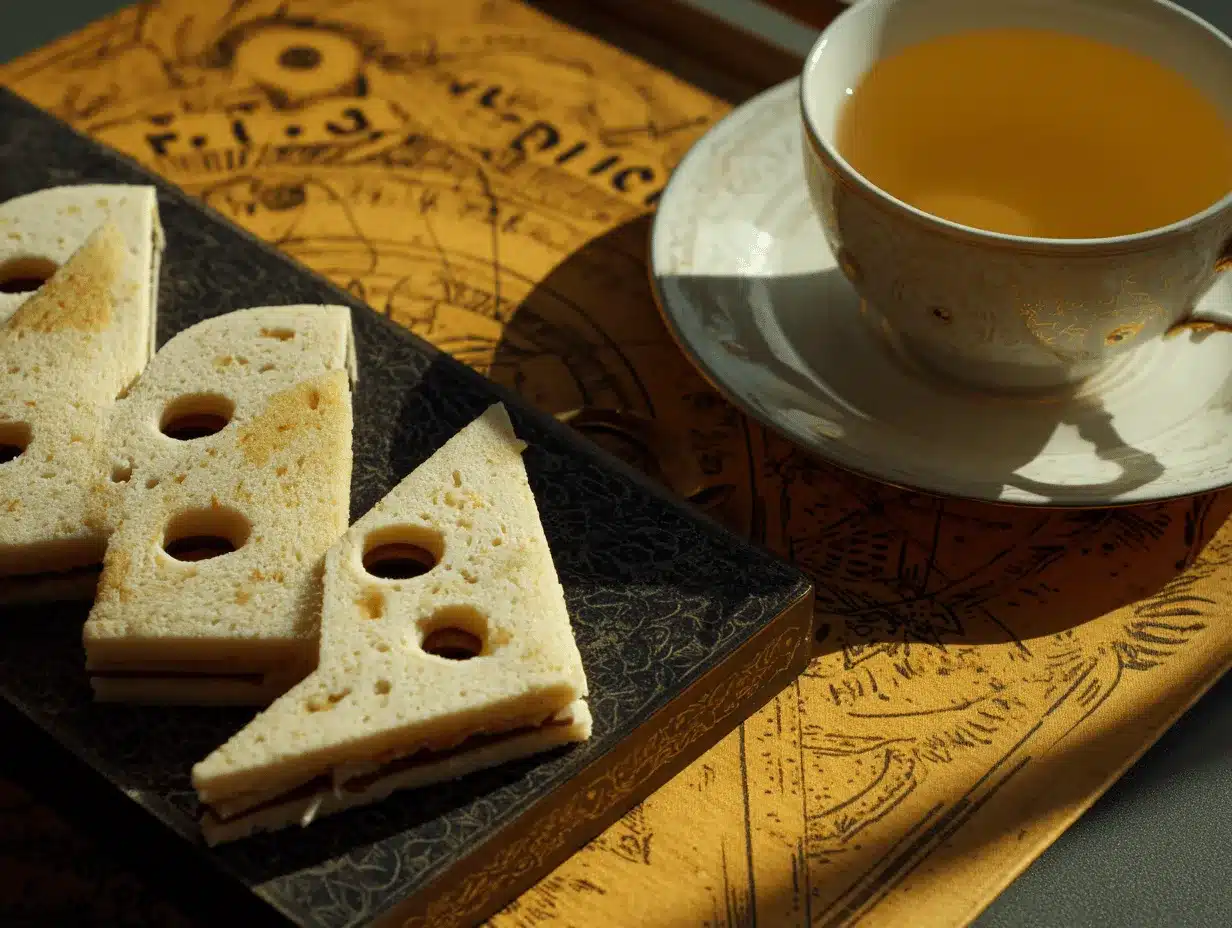
Sharp little triangles, creamy filling, and a mysterious shape—these planchette tea sandwiches are the kind of Halloween snack that instantly sets the mood. The first time I made them, I honestly thought they’d be a bit gimmicky (you know, just for the “spooky” factor). But halfway through prepping, I realized they’re actually the perfect balance of playful and tasty. The soft bread, the savory filling, and that unmistakable ouija-inspired look make these sandwiches a total crowd magnet.
I discovered planchette tea sandwiches when searching for unique Halloween ideas for my kids’ party. They’re named after the heart-shaped pointer from a Ouija board—so, right away, there’s a fun, slightly mysterious vibe. Plus, let’s face it, Halloween is all about mixing a little fright with a lot of delight! Over the years, I’ve tweaked my recipe to make it kid-friendly, easy to assemble, and visually striking for any Pinterest-worthy spread.
Why do I love this recipe so much? For starters, planchette tea sandwiches are foolproof—no fancy ingredients, no complicated steps. They’re perfect for little hands and big imaginations. Whether you’re hosting a themed tea party, a school celebration, or just want to surprise your family with something special, these sandwiches always get a reaction. I’ve made them for five years running, and they’re now a non-negotiable part of our Halloween traditions. So, if you’re ready to add some edible magic to your spooky festivities, keep reading for everything you need to know about making irresistible planchette tea sandwiches for your next Halloween tea party!
Why You’ll Love This Recipe
After countless Halloween parties and more sandwich experiments than I can count (seriously, I’ve tried everything from pumpkin to beet fillings), I can honestly say this planchette tea sandwiches recipe is a winner. Here’s what makes them special—and why you’ll want them on your spooky snack table:
- Quick & Easy: You can whip up a whole batch in under 30 minutes, which is perfect for last-minute party prep or busy school nights.
- Simple Ingredients: No need to hunt for weird stuff—just basic sandwich fixings, plus a few spooky touches.
- Perfect for Halloween: These sandwiches look like tiny Ouija board planchettes, making them ideal for tea parties, classroom treats, or a festive lunchbox surprise.
- Crowd-Pleaser: Kids go wild for the fun shapes, and adults love the creamy, savory filling. You’ll probably see a few sandwiches disappear before you finish plating!
- Unbelievably Delicious: There’s something about the combo of soft bread, tangy cream cheese, and crunchy veggies that just works. Plus, the little olive “eye” adds a salty pop.
What sets this recipe apart? I use a blend of cream cheese and mayo for ultra-smooth texture—trust me, blending these makes the filling spread like a dream. If you’ve ever tried making tea sandwiches and ended up with dry bread or bland filling, this recipe solves that problem. The shape itself is a conversation starter (kids always ask if the sandwiches are magic!). Plus, you don’t have to be a pro—these come out cute even if you’re not a precise cutter. This recipe isn’t just a snack; it’s a little Halloween ritual, packed with comfort, fun, and just enough spookiness to keep everyone entertained.
Honestly, watching my kids try to “read” each other’s sandwiches like a Ouija board pointer is a party highlight every year. If you’re looking to create a moment that’s both memorable and delicious, planchette tea sandwiches are it. Whether it’s for a Pinterest-worthy spread or just a cozy night in, this is the kind of recipe that brings everyone together—no tricks, just treats!
Ingredients Needed
This recipe is all about simple, classic ingredients that come together for the ultimate Halloween tea sandwich. You probably already have most of these in your kitchen, and if not, they’re easy to find. Here’s what you’ll need for your planchette tea sandwiches:
- For the Sandwiches:
- White sandwich bread (or whole wheat for a nutty flavor—crusts trimmed, about 12 slices)
- Softened cream cheese (8 oz / 225g, at room temperature for easy spreading)
- Mayonnaise (2 tablespoons / 30ml, adds richness and helps the filling stay creamy)
- Finely chopped cucumber (½ cup / 75g, peeled and seeded for best texture)
- Grated carrot (¼ cup / 35g, for a touch of sweetness and Halloween color)
- Salt and black pepper (to taste)
- For Decoration:
- Sliced black olives (for the “planchette eye”—about 12 slices)
- Fresh chives (optional, for a grassy “spooky” look)
- Edible food marker (optional, for adding mystic symbols—if you want extra flair!)
Ingredient Notes & Substitutions:
For the bread, classic white is easiest to cut and has a soft texture. If you need gluten-free, use your favorite GF sandwich loaf (I’ve had good luck with Canyon Bakehouse). Cream cheese can be swapped for dairy-free alternatives if you’re serving vegans—just pick one that’s firm enough to spread. For the veggies, you can substitute radish or bell pepper for crunch and color, especially if your kids aren’t fans of cucumber. Mayo adds smoothness, but Greek yogurt works in a pinch for a lighter version. If you’re out of olives, a small dot of black bean or even a raisin can mimic the look. And don’t worry about perfection—sometimes a lopsided sandwich is the best kind!
I like to use Philadelphia cream cheese for the filling and Lindsay Naturals olives for the “eye.” Both have reliable flavor and texture. If you’re making these sandwiches ahead, stick with firmer veggies so the bread doesn’t get soggy. In the summer, you can swap in fresh herbs for a garden-fresh twist. Pro tip: always taste your filling before spreading—it should be tangy, a bit salty, and super creamy. Feel free to get creative with what you have on hand. That’s the beauty of planchette tea sandwiches—playful, adaptable, and always tasty!
Equipment Needed
Making planchette tea sandwiches doesn’t require fancy gadgets—just a few kitchen basics and a little creativity. Here’s what you’ll need:
- Sharp paring knife (for cutting the planchette shape—if you have a planchette-shaped cookie cutter, use it! But freehand works just fine)
- Cutting board (preferably non-slip, for easy trimming and shaping)
- Mixing bowl (for whipping up the filling—medium size is perfect)
- Spatula or butter knife (for spreading the filling evenly)
- Measuring cups and spoons (for getting the ratios just right)
- Small round cutter or bottle cap (optional, for making the “eye” hole—otherwise, just use your knife)
- Serving platter (to arrange your spooky sandwiches in style)
If you don’t have a cookie cutter, don’t stress—just sketch a planchette shape on parchment and use it as a guide. I’ve done this with everything from cardboard stencils to upside-down measuring cups! For cleanup, a damp cloth works wonders for wiping away stray crumbs and filling. If you’re making a big batch, a food processor can help chop veggies super fine, but hand-chopping gives you more control. Budget-wise, you really don’t need to buy anything special—just use what’s in your kitchen.
I’ve found that keeping your knife sharp is key for neat shapes—run it over a honing steel before starting. For serving, a dark platter or slate board gives the sandwiches extra “spooky” flair. If you’re hosting kids, try using small paper doilies for a tea party vibe. Honestly, you’ll find your own system as you go—sometimes the simplest tools work best!
Preparation Method
Ready to make your planchette tea sandwiches? Follow these simple steps for picture-perfect results. You’ll have a batch of spooky snacks in no time!
- Prep the Filling:
In a medium bowl, combine 8 oz (225g) softened cream cheese and 2 tablespoons (30ml) mayonnaise. Whip together until smooth and fluffy—about 1 minute with a spatula or electric mixer. Stir in ½ cup (75g) finely chopped cucumber and ¼ cup (35g) grated carrot. Add salt and pepper to taste (usually about ¼ teaspoon each). Mix until veggies are evenly distributed. Taste and adjust seasoning.
Tip: If filling seems runny, refrigerate for 10 minutes to firm up. - Trim the Bread:
Stack 12 slices of bread and cut off crusts (save for homemade breadcrumbs!). Place slices on a cutting board. Using a paring knife, cut each slice into a planchette shape—a rounded triangle with a pointed end. If you’re using a stencil, lay it over each slice and trace with your knife. Aim for even thickness so sandwiches stack nicely.
Prep note: Don’t worry if shapes aren’t perfect—imperfection adds character! - Make the “Eye” Hole:
Using a small round cutter, bottle cap, or knife, cut a small circle near the pointed end of half the bread slices (these will be your tops). Make sure it’s not too close to the edge, so the sandwich stays sturdy. If you want, use an edible marker to draw mystic symbols or outlines around the “eye.”
Sensory cue: The bread should feel soft but hold its shape. - Spread the Filling:
Take the remaining bread slices (without holes) and spread a generous layer of cream cheese filling—about 1½ tablespoons (20g) per sandwich. Smooth all the way to the edges for a neat finish.
Time estimate: Takes about 5 minutes for a full batch. - Assemble the Sandwiches:
Place a top slice (with “eye” hole) over each filled slice. Gently press down so the filling peeks through the hole. For decoration, tuck a sliced olive into each “eye,” pressing lightly so it sticks to the cream filling. If using chives, arrange them around the edges for a “grass” effect.
Prep warning: Don’t press too hard—bread can tear easily. - Arrange and Serve:
Set sandwiches on a serving platter. For a spooky vibe, scatter a few extra olives and carrots around the plate. If making ahead, cover tightly with plastic wrap and refrigerate up to 4 hours.
Sensory cue: Sandwiches should look neat, smell fresh, and feel cool to the touch.
Troubleshooting Tips:
If your sandwiches get soggy, try patting veggies dry before mixing into the filling. Bread too dry? Brush slices lightly with softened butter before adding filling. For stubborn bread edges, use a serrated knife instead of a paring knife. And if you end up with leftover filling, spread it on crackers for an extra snack!
Personal tip: I like to prep all the bread shapes first, then set up a mini assembly line—kids love helping with the “eye” part. The key is to keep it fun and festive, not fussy. You’ll get the hang of it after the first few sandwiches!
Cooking Tips & Techniques
Over the years, I’ve picked up a handful of tricks for perfect planchette tea sandwiches. Here’s what I’ve learned (sometimes the hard way):
- Keep Bread Fresh: Soft, fresh bread works best—if yours is a bit stale, microwave the slices for 10 seconds under a damp towel to revive them.
- Chill Filling First: After mixing the cream cheese filling, pop it in the fridge for 10-15 minutes. This makes spreading easier and helps sandwiches hold their shape.
- Dry Veggies Thoroughly: Wet cucumbers and carrots can make the filling watery. After chopping, blot veggies with paper towels before mixing in.
- Shape Sandwiches With Confidence: Don’t sweat the details—freehand cutting gives each sandwich a unique look. If kids are helping, they’ll love making their own “magic” shapes.
- Assembly Line Efficiency: Set up bread, filling, toppings, and decorations in order. This makes things go faster and keeps your kitchen (mostly) tidy.
- Common Mistakes: Overfilling sandwiches can cause them to burst, so stick to about 1½ tablespoons (20g) per sandwich. And don’t skip trimming the crusts—they make the planchette shape look polished.
- Personal Failures: One year, I tried making these with rye bread. They looked cool but tasted way too strong for the kids. Stick with mild-flavored bread for best results!
- Timing: If you’re prepping for a party, make sandwiches no more than 4 hours ahead. Longer than that and the bread starts to dry out or get soggy.
- Consistency: For even sandwiches, use a measuring spoon for filling and a template for cutting bread. But honestly, a little variation in size just adds to the charm.
The secret to success? Don’t rush, and embrace the imperfections. With these tips, your planchette tea sandwiches will be the star of any Halloween spread!
Variations & Adaptations
One of the best things about this planchette tea sandwiches recipe is how easy it is to adapt. Whether you’re dealing with dietary restrictions, seasonal ingredients, or just picky eaters, there’s a way to make it work:
- Gluten-Free: Swap regular bread for your favorite gluten-free sandwich loaf. Just make sure it’s soft and sturdy—Canyon Bakehouse is my go-to.
- Vegan: Use dairy-free cream cheese (like Kite Hill) and vegan mayo. For the “eye,” replace olives with a dot of black bean or vegan cheese.
- Flavor Boost: Add a pinch of garlic powder or fresh dill to the filling for extra zing. Smoked paprika gives a subtle “mystic” touch.
- Seasonal Swaps: In summer, try chopped red bell pepper or radishes instead of carrots and cucumber. In fall, diced roasted pumpkin makes a fun orange filling.
- Differing Methods: For tea parties, cut sandwiches smaller (mini planchettes!) and serve with herbal tea. For lunchboxes, make larger sandwiches and wrap individually.
- Allergen Substitutions: If you need nut-free, check ingredient labels for bread and cream cheese brands. For egg allergies, skip mayo and use extra cream cheese or mashed avocado.
My favorite twist? Last year, I made a “monster” version by adding tiny capers and a squiggle of sriracha for a spicy kick. The kids thought they were hilarious! Don’t be afraid to get creative—these sandwiches are meant to be fun, not rigid. Mix and match flavors, colors, and shapes as you like. The goal is a batch of spookily delicious snacks that everyone can enjoy.
Serving & Storage Suggestions
Planchette tea sandwiches look best when served fresh and slightly chilled. Arrange them on a dark platter or slate board for maximum Halloween drama—sprinkle a few chives or carrot shreds for “grass” or “magic” effect. If you want to go all out, add a few toy spiders or edible glitter around the sandwiches for a true Pinterest moment.
Serve sandwiches cold or at room temperature. They pair perfectly with herbal teas (like chamomile or mint), apple cider, or even spooky punch for kids. If you’re planning a tea party, try mini pumpkin muffins or fruit kabobs as side dishes. For a grown-ups’ spread, a bowl of roasted nuts or hummus works nicely.
Storage is simple: cover sandwiches tightly with plastic wrap and refrigerate up to 4 hours. If you need to keep them longer, store filling and bread separately, then assemble just before serving. These sandwiches don’t freeze well (the bread gets mushy), but you can prep everything else ahead. To reheat (if you must), microwave for 10 seconds—but honestly, they’re best cold. Over time, the flavors mingle and mellow, making leftovers surprisingly tasty the next day. Just watch for soggy bread—fresh is always best!
Nutritional Information & Benefits
Each planchette tea sandwich (with cream cheese filling) is approximately:
- Calories: 120
- Protein: 4g
- Carbs: 12g
- Fat: 7g
- Fiber: 1g
Cream cheese and cucumber make these sandwiches surprisingly balanced—low in sugar and a decent source of calcium. Using whole wheat bread adds extra fiber, and veggies bring vitamins A and C. For gluten-free or vegan options, nutritional values may vary slightly, but the basic profile remains light and satisfying.
Potential allergens include dairy (cream cheese), gluten (bread), and eggs (mayo). If you have dietary restrictions, swap ingredients as needed—there are plenty of alternatives. I love that these sandwiches can be made lighter (with Greek yogurt) or richer (extra cream cheese) depending on your needs. For me, they fit into a balanced Halloween treat—fun, festive, and not too heavy. If you’re watching sodium, skip the olives or use low-salt versions. It’s the kind of snack that feels like a treat but won’t weigh you down.
Conclusion
If you’re searching for a creative, tasty, and totally irresistible Halloween snack, planchette tea sandwiches are the answer. They’re easy to make, endlessly adaptable, and guaranteed to get everyone talking (and munching!). Whether you’re hosting a spooky tea party or just want a fun after-school treat, this recipe brings a little magic to your table.
I’ve made these sandwiches more times than I can count, and they’re always a hit—from Pinterest-perfect spreads to laid-back family nights. Don’t be afraid to play with flavors and shapes—the real joy is in making something that feels personal and festive. Honestly, watching kids giggle over the planchette “eyes” is worth every minute of prep.
Give these sandwiches a try, and let me know how you make them your own! Share your creations, swap tips, or drop your favorite filling combos in the comments. Here’s to a spooky, delicious, and memorable Halloween—one sandwich at a time!
Frequently Asked Questions
How do I cut the bread into a planchette shape?
Use a paring knife and trace a rounded triangle with a pointed end. If you’d like, make a simple stencil from parchment paper or cardboard to guide you.
Can I make planchette tea sandwiches ahead of time?
Yes, you can assemble and refrigerate up to 4 hours before serving. For longer storage, keep filling and bread separate, then assemble right before your party.
What fillings work best for picky eaters?
Cream cheese and cucumber are mild and kid-friendly. You can also use plain ham, turkey, or even peanut butter if needed—just avoid fillings that make the bread soggy.
Are these sandwiches safe for nut allergies?
Absolutely! The basic recipe contains no nuts. Just check your bread and cream cheese brands for cross-contamination warnings if you’re serving someone with allergies.
How do I make these sandwiches vegan?
Swap cream cheese and mayo for dairy-free versions, and use vegan bread. Replace the olive “eye” with a slice of black bean or vegan cheese for decoration.
Pin This Recipe!


Planchette Tea Sandwiches Recipe: Easy Halloween Party Snacks for Kids
- Total Time: 25-30 minutes
- Yield: 12 sandwiches 1x
Description
These planchette tea sandwiches are a playful and tasty Halloween snack, featuring soft bread, a creamy savory filling, and a fun Ouija-inspired shape. Perfect for parties, lunchboxes, or festive tea spreads, they’re quick to make and always a crowd-pleaser.
Ingredients
- 12 slices white sandwich bread (or whole wheat, crusts trimmed)
- 8 oz softened cream cheese (room temperature)
- 2 tablespoons mayonnaise
- 1/2 cup finely chopped cucumber (peeled and seeded)
- 1/4 cup grated carrot
- Salt and black pepper, to taste
- 12 slices black olives (for decoration)
- Fresh chives (optional, for decoration)
- Edible food marker (optional, for decoration)
Instructions
- In a medium bowl, combine softened cream cheese and mayonnaise. Whip together until smooth and fluffy.
- Stir in finely chopped cucumber and grated carrot. Add salt and pepper to taste. Mix until veggies are evenly distributed. Taste and adjust seasoning.
- Stack bread slices and trim off crusts. Cut each slice into a planchette shape (rounded triangle with a pointed end), using a paring knife or stencil.
- Using a small round cutter, bottle cap, or knife, cut a small circle near the pointed end of half the bread slices (these will be the tops). Optionally, decorate with edible marker.
- Spread about 1 1/2 tablespoons of cream cheese filling onto each bottom bread slice (without holes), smoothing to the edges.
- Place a top slice (with ‘eye’ hole) over each filled slice. Gently press down so the filling peeks through the hole.
- Tuck a sliced olive into each ‘eye’ hole for decoration. Optionally, arrange chives around the edges for a ‘grass’ effect.
- Arrange sandwiches on a serving platter. Serve immediately or cover tightly and refrigerate up to 4 hours before serving.
Notes
For best results, use soft, fresh bread and chill the filling before assembly. Pat veggies dry to prevent sogginess. Sandwiches can be made gluten-free or vegan with substitutions. Make up to 4 hours ahead, but assemble close to serving for freshest texture. Imperfect shapes add charm—let kids help with decorating!
- Prep Time: 15 minutes
- Cook Time: 0 minutes
- Category: Snack
- Cuisine: American
Nutrition
- Serving Size: 1 sandwich
- Calories: 120
- Sugar: 2
- Sodium: 220
- Fat: 7
- Saturated Fat: 4
- Carbohydrates: 12
- Fiber: 1
- Protein: 4
Keywords: Halloween, tea sandwiches, party snacks, kid-friendly, spooky, Ouija, vegetarian, easy, finger food